Brother International PEDESIGN 7.0 Users Manual - English - Page 241
Importing the embroidery, pattern into Layout & Editing
 |
View all Brother International PEDESIGN 7.0 manuals
Add to My Manuals
Save this manual to your list of manuals |
Page 241 highlights
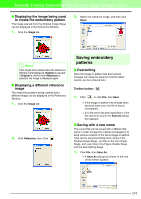
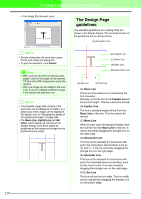
Manually Creating Embroidery Patterns From Images (Design Center) 2. Select the drive and the folder, and then type in the file name. b Memo: • The correct extension is automatically selected. • Image data from the Original Image Stage can only be saved as a bitmap file (.bmp). In the Line Image Stage, image data is saved as a .pel file. In the Figure Handle Stage and the Sew Setting Stage, pattern data is saved as a .pem file. a Note: If you select a file type of a previous software version, saved .pem files can be opened with that version of the software; however, some information may be lost. a Note: If the sewing attributes of an outline or region are not set, the embroidery pattern cannot be imported. Toolbar button: 1. Click , or click Stage on the menu bar, and then click To Layout & Editing. → The Import size dialog box appears. b Memo: When opening a .pem file in Design Center version 7 with a file saved at the Sew Setting Stage in Design Center version 1.x, go back to the Figure Handle Stage, and then go to the Sew Setting Stage to obtain the sewing data at a higher quality. 3. Click Save to save the data. b Memo: • To quit the operation, click Cancel. • If a file already exists with the name specified in the Save As dialog box, the following message appears. • To overwrite the file, click Yes. • If you do not want to overwrite the existing file, click No. You can then enter a different file name. 2. In the Magnification box, type or select the magnification factor. a Note: • The embroidery pattern cannot be magnified to a size larger than the Design Page. • The magnification factor cannot be set below 25%. 3. Under Orientation, select the desired orientation. 4. Click Import to import the embroidery pattern. b Memo: To quit the operation and close the dialog box, click Cancel. → The embroidery pattern is displayed in the Design Page of the Layout & Editing window. Importing the embroidery pattern into Layout & Editing Layout & Editing can be opened from Design Center, and the embroidery pattern completed in the Sew Setting Stage of Design Center can be imported into a Design Page in the Layout & Editing window. 235
-
 1
1 -
2
-
3
-
4
-
5
-
6
-
7
-
8
-
9
-
10
-
11
-
12
-
13
-
14
-
15
-
16
-
17
-
18
-
19
-
20
-
21
-
22
-
23
-
24
-
25
-
26
-
27
-
28
-
29
-
30
-
31
-
32
-
33
-
34
-
35
-
36
-
37
-
38
-
39
-
40
-
41
-
42
-
43
-
44
-
45
-
46
-
47
-
48
-
49
-
50
-
51
-
52
-
53
-
54
-
55
-
56
-
57
-
58
-
59
-
60
-
61
-
62
-
63
-
64
-
65
-
66
-
67
-
68
-
69
-
70
-
71
-
72
-
73
-
74
-
75
-
76
-
77
-
78
-
79
-
80
-
81
-
82
-
83
-
84
-
85
-
86
-
87
-
88
-
89
-
90
-
91
-
92
-
93
-
94
-
95
-
96
-
97
-
98
-
99
-
100
-
101
-
102
-
103
-
104
-
105
-
106
-
107
-
108
-
109
-
110
-
111
-
112
-
113
-
114
-
115
-
116
-
117
-
118
-
119
-
120
-
121
-
122
-
123
-
124
-
125
-
126
-
127
-
128
-
129
-
130
-
131
-
132
-
133
-
134
-
135
-
136
-
137
-
138
-
139
-
140
-
141
-
142
-
143
-
144
-
145
-
146
-
147
-
148
-
149
-
150
-
151
-
152
-
153
-
154
-
155
-
156
-
157
-
158
-
159
-
160
-
161
-
162
-
163
-
164
-
165
-
166
-
167
-
168
-
169
-
170
-
171
-
172
-
173
-
174
-
175
-
176
-
177
-
178
-
179
-
180
-
181
-
182
-
183
-
184
-
185
-
186
-
187
-
188
-
189
-
190
-
191
-
192
-
193
-
194
-
195
-
196
-
197
-
198
-
199
-
200
-
201
-
202
-
203
-
204
-
205
-
206
-
207
-
208
-
209
-
210
-
211
-
212
-
213
-
214
-
215
-
216
-
217
-
218
-
219
-
220
-
221
-
222
-
223
-
224
-
225
-
226
-
227
-
228
-
229
-
230
-
231
-
232
-
233
-
234
-
235
-
 236
236 -
 237
237 -
 238
238 -
 239
239 -
 240
240 -
 241
241 -
 242
242 -
 243
243 -
 244
244 -
 245
245 -
 246
246 -
247
-
248
-
249
-
250
-
251
-
252
-
253
-
254
-
255
-
256
-
257
-
258
-
259
-
260
-
261
-
262
-
263
-
264
-
265
-
266
-
267
-
268
-
269
-
270
-
271
-
272
-
273
-
274
-
275
-
276
-
277
-
278
-
279
-
280
-
281
-
282
-
283
-
284
-
285
-
286
-
287
-
288
-
289
-
290
-
291
-
292
-
293
-
294
-
295
-
296
-
297
-
298
-
299
-
300
-
301
-
302
-
303
-
304
-
305
-
306
-
307
-
308
-
309
-
310
-
311
-
312
-
313
-
314
-
315
-
316
-
317
-
318
-
319
-
320
-
321
-
322
-
323
-
324
-
325
-
326
-
327
-
328
-
329
-
330
-
331
-
332
-
333
-
334
-
335
-
336
-
337
-
338
-
339
-
340
-
341
-
342
-
343
-
344
-
345
-
346
-
347
-
348
-
349
-
350
-
351
-
352
-
353
-
354
-
355
-
356
-
357
-
358
-
359
-
360
-
361
 |
 |