Brother International PEDESIGN 7.0 Users Manual - English - Page 210
Deleting outlines, Cutting out outlines, Copying outlines, Pasting a cut or copied outline, Undoing
 |
View all Brother International PEDESIGN 7.0 manuals
Add to My Manuals
Save this manual to your list of manuals |
Page 210 highlights
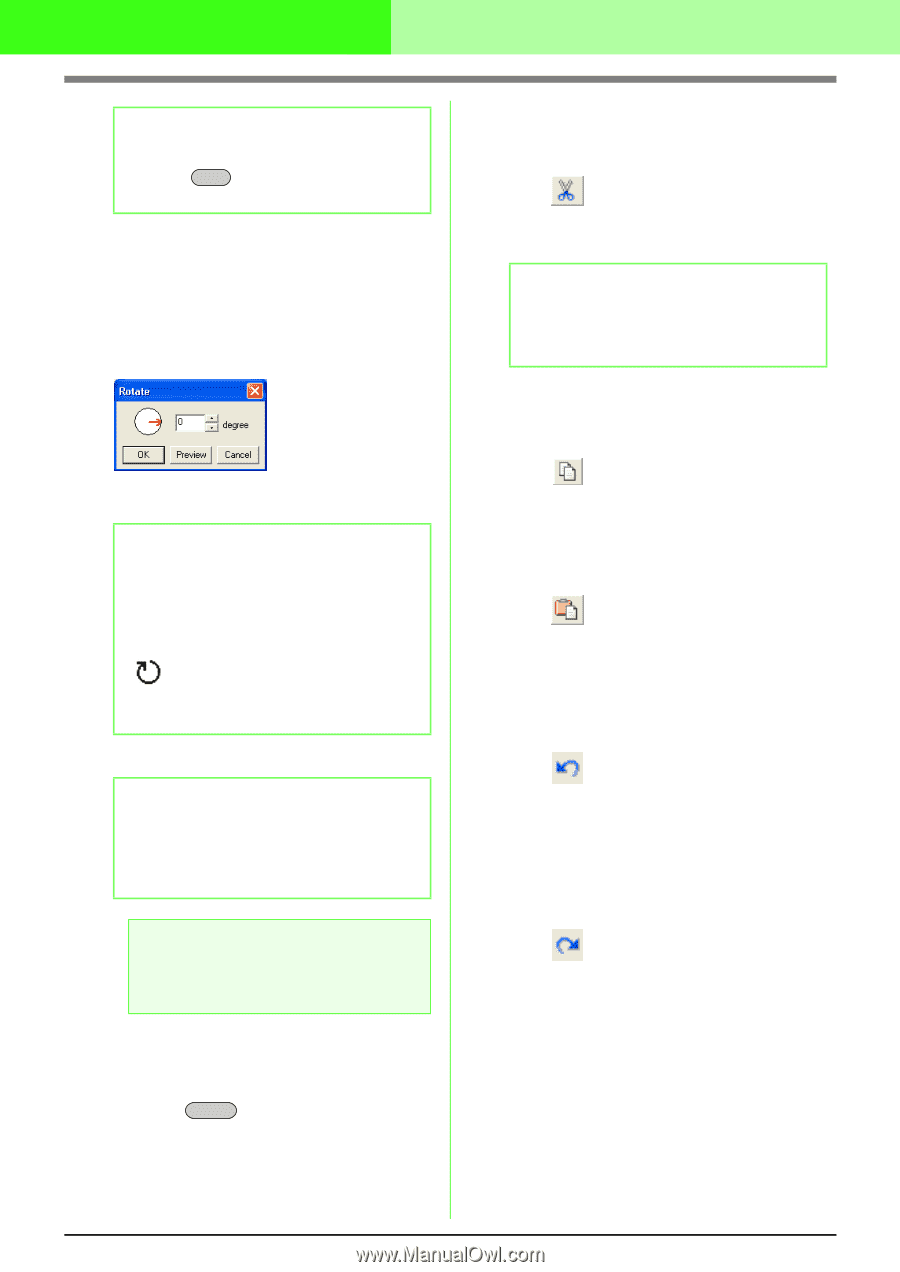
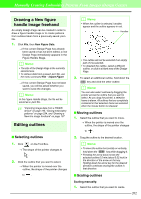
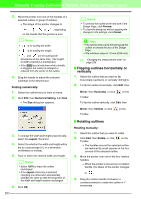
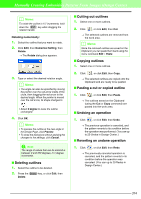
Manually Creating Embroidery Patterns From Images (Design Center) b Memo: To rotate the outline in 15° increments, hold down the Shift key while dragging the rotation handle. Rotating numerically: 1. Select the outline that you want to rotate. 2. Click Edit, then Numerical Setting, then Rotate. → The Rotate dialog box appears. 3. Type or select the desired rotation angle. b Memo: • The angle can also be specified by moving the pointer over the red arrow inside of the circle, then dragging the red arrow to the desired angle. When the pointer is moved over the red arrow, its shape changes to . • Select 0 degree to leave the outline unchanged. 4. Click OK. b Memo: • To preview the outline at the new angle in the Design Page, click Preview. • To close the dialog box without applying the changes to the settings, click Cancel. a Note: The range of values that can be entered is between 0 and 359 degrees, in 1-degree increments. I Deleting outlines 1. Select the outline to be deleted. 2. Press the Delete key, or click Edit, then Delete. I Cutting out outlines 1. Select one or more outlines. 2. Click , or click Edit, then Cut. → The selected outlines are removed from the work area. b Memo: Since the removed outlines are saved on the Clipboard, you can paste them back using the menu command Edit - Paste. I Copying outlines 1. Select one or more outlines. 2. Click , or click Edit, then Copy. → The selected outlines are copied onto the Clipboard and are ready to be pasted. I Pasting a cut or copied outline 1. Click , or click Edit, then Paste. → The outlines saved on the Clipboard (using the Cut or Copy command) are pasted into the work area. I Undoing an operation 1. Click , or click Edit, then Undo. → The previous operation is canceled, and the pattern reverts to its condition before the operation was performed. (You can up to 20 Undos in Design Center.) I Reverting an undone operation 1. Click , or click Edit, then Redo. → The previously canceled operation is canceled, and the pattern reverts to its condition before the operation was canceled. (You can up to 20 Redos in Design Center.) 204
-
 1
1 -
2
-
3
-
4
-
5
-
6
-
7
-
8
-
9
-
10
-
11
-
12
-
13
-
14
-
15
-
16
-
17
-
18
-
19
-
20
-
21
-
22
-
23
-
24
-
25
-
26
-
27
-
28
-
29
-
30
-
31
-
32
-
33
-
34
-
35
-
36
-
37
-
38
-
39
-
40
-
41
-
42
-
43
-
44
-
45
-
46
-
47
-
48
-
49
-
50
-
51
-
52
-
53
-
54
-
55
-
56
-
57
-
58
-
59
-
60
-
61
-
62
-
63
-
64
-
65
-
66
-
67
-
68
-
69
-
70
-
71
-
72
-
73
-
74
-
75
-
76
-
77
-
78
-
79
-
80
-
81
-
82
-
83
-
84
-
85
-
86
-
87
-
88
-
89
-
90
-
91
-
92
-
93
-
94
-
95
-
96
-
97
-
98
-
99
-
100
-
101
-
102
-
103
-
104
-
105
-
106
-
107
-
108
-
109
-
110
-
111
-
112
-
113
-
114
-
115
-
116
-
117
-
118
-
119
-
120
-
121
-
122
-
123
-
124
-
125
-
126
-
127
-
128
-
129
-
130
-
131
-
132
-
133
-
134
-
135
-
136
-
137
-
138
-
139
-
140
-
141
-
142
-
143
-
144
-
145
-
146
-
147
-
148
-
149
-
150
-
151
-
152
-
153
-
154
-
155
-
156
-
157
-
158
-
159
-
160
-
161
-
162
-
163
-
164
-
165
-
166
-
167
-
168
-
169
-
170
-
171
-
172
-
173
-
174
-
175
-
176
-
177
-
178
-
179
-
180
-
181
-
182
-
183
-
184
-
185
-
186
-
187
-
188
-
189
-
190
-
191
-
192
-
193
-
194
-
195
-
196
-
197
-
198
-
199
-
200
-
201
-
202
-
203
-
204
-
 205
205 -
 206
206 -
 207
207 -
 208
208 -
 209
209 -
 210
210 -
 211
211 -
 212
212 -
 213
213 -
 214
214 -
 215
215 -
216
-
217
-
218
-
219
-
220
-
221
-
222
-
223
-
224
-
225
-
226
-
227
-
228
-
229
-
230
-
231
-
232
-
233
-
234
-
235
-
236
-
237
-
238
-
239
-
240
-
241
-
242
-
243
-
244
-
245
-
246
-
247
-
248
-
249
-
250
-
251
-
252
-
253
-
254
-
255
-
256
-
257
-
258
-
259
-
260
-
261
-
262
-
263
-
264
-
265
-
266
-
267
-
268
-
269
-
270
-
271
-
272
-
273
-
274
-
275
-
276
-
277
-
278
-
279
-
280
-
281
-
282
-
283
-
284
-
285
-
286
-
287
-
288
-
289
-
290
-
291
-
292
-
293
-
294
-
295
-
296
-
297
-
298
-
299
-
300
-
301
-
302
-
303
-
304
-
305
-
306
-
307
-
308
-
309
-
310
-
311
-
312
-
313
-
314
-
315
-
316
-
317
-
318
-
319
-
320
-
321
-
322
-
323
-
324
-
325
-
326
-
327
-
328
-
329
-
330
-
331
-
332
-
333
-
334
-
335
-
336
-
337
-
338
-
339
-
340
-
341
-
342
-
343
-
344
-
345
-
346
-
347
-
348
-
349
-
350
-
351
-
352
-
353
-
354
-
355
-
356
-
357
-
358
-
359
-
360
-
361
 |
 |