Adobe 65045315 Photoshop Elements Manual - Page 123
The Adjust Levels Guided Edit, About Levels adjustments
 |
UPC - 883919176512
View all Adobe 65045315 manuals
Add to My Manuals
Save this manual to your list of manuals |
Page 123 highlights
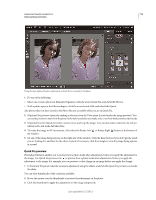
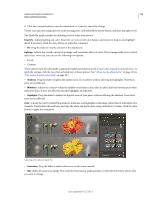
USING PHOTOSHOP ELEMENTS 10 117 Color and tonal correction 1. Specify a color management option. Specify color management options. (See "Set up color management" on page 194.) 2. View the image at 100% and crop, if necessary. Before making any color corrections, view the image at a zoom percentage of 100%. At 100%, Photoshop Elements displays the image most accurately. You can also check for image defects, such as dust spots and scratches. If you plan to crop the file, do it now to reduce memory requirements and to ensure that the histogram uses only relevant information. Using the Zoom tool to zoom out may optimize the view before cropping an image, so that you crop a well-centered selection. 3. Check the scan quality and tonal range. Look at the image's histogram to evaluate whether the image has sufficient detail to produce high-quality output. 4. Resize your image, if necessary. Resize your image to the size that you need if you are going to use it in another application or project. If you are going to print it or use it in a Photoshop Elements project, you generally don't need to resize it. (See "About image size and resolution" on page 151.) 5. Adjust the highlights and shadows. Begin corrections by adjusting the values of the extreme highlight and shadow pixels in the image (also known as the tonal range). Setting an overall tonal range allows for the most detail possible throughout the image. This process is known as setting the highlight and shadow or setting the white and black points. (See "About Levels adjustments" on page 125 or "The Adjust Levels Guided Edit" on page 55.) 6. Adjust the color balance. After correcting the tonal range, you can adjust the image's color balance to remove unwanted color casts or to correct oversaturated or undersaturated colors. With some Photoshop Elements auto commands, both the tonal range and color are corrected in one step. (See "Adjust saturation and hue" on page 134.) 7. Make other special color adjustments. Once you have corrected the overall color balance of your image, you can make optional adjustments to enhance colors. For example, you can increase the vividness of color in your image by increasing its saturation. 8. Retouch the image. Use the retouching tools, like the Spot Healing Brush, to remove any dust spots or defects in the image. (See "Remove spots and small imperfections" on page 156.) 9. Sharpen the clarity of the image. As a final step, sharpen the clarity of edges in the image. This process helps restore detail and sharpness that tonal adjustments may reduce. (See "Sharpening overview" on page 171.) More Help topics "About camera raw image files" on page 85 Last updated 1/2/2012
-
 1
1 -
2
-
3
-
4
-
5
-
6
-
7
-
8
-
9
-
10
-
11
-
12
-
13
-
14
-
15
-
16
-
17
-
18
-
19
-
20
-
21
-
22
-
23
-
24
-
25
-
26
-
27
-
28
-
29
-
30
-
31
-
32
-
33
-
34
-
35
-
36
-
37
-
38
-
39
-
40
-
41
-
42
-
43
-
44
-
45
-
46
-
47
-
48
-
49
-
50
-
51
-
52
-
53
-
54
-
55
-
56
-
57
-
58
-
59
-
60
-
61
-
62
-
63
-
64
-
65
-
66
-
67
-
68
-
69
-
70
-
71
-
72
-
73
-
74
-
75
-
76
-
77
-
78
-
79
-
80
-
81
-
82
-
83
-
84
-
85
-
86
-
87
-
88
-
89
-
90
-
91
-
92
-
93
-
94
-
95
-
96
-
97
-
98
-
99
-
100
-
101
-
102
-
103
-
104
-
105
-
106
-
107
-
108
-
109
-
110
-
111
-
112
-
113
-
114
-
115
-
116
-
117
-
 118
118 -
 119
119 -
 120
120 -
 121
121 -
 122
122 -
 123
123 -
 124
124 -
 125
125 -
 126
126 -
 127
127 -
 128
128 -
129
-
130
-
131
-
132
-
133
-
134
-
135
-
136
-
137
-
138
-
139
-
140
-
141
-
142
-
143
-
144
-
145
-
146
-
147
-
148
-
149
-
150
-
151
-
152
-
153
-
154
-
155
-
156
-
157
-
158
-
159
-
160
-
161
-
162
-
163
-
164
-
165
-
166
-
167
-
168
-
169
-
170
-
171
-
172
-
173
-
174
-
175
-
176
-
177
-
178
-
179
-
180
-
181
-
182
-
183
-
184
-
185
-
186
-
187
-
188
-
189
-
190
-
191
-
192
-
193
-
194
-
195
-
196
-
197
-
198
-
199
-
200
-
201
-
202
-
203
-
204
-
205
-
206
-
207
-
208
-
209
-
210
-
211
-
212
-
213
-
214
-
215
-
216
-
217
-
218
-
219
-
220
-
221
-
222
-
223
-
224
-
225
-
226
-
227
-
228
-
229
-
230
-
231
-
232
-
233
-
234
-
235
-
236
-
237
-
238
-
239
-
240
-
241
-
242
-
243
-
244
-
245
-
246
-
247
-
248
-
249
-
250
-
251
-
252
-
253
-
254
-
255
-
256
-
257
-
258
-
259
-
260
-
261
-
262
-
263
-
264
-
265
-
266
-
267
-
268
-
269
-
270
-
271
-
272
-
273
-
274
-
275
-
276
-
277
-
278
-
279
-
280
-
281
-
282
-
283
-
284
-
285
-
286
-
287
-
288
-
289
-
290
-
291
-
292
-
293
-
294
-
295
-
296
-
297
-
298
-
299
-
300
-
301
-
302
-
303
-
304
-
305
-
306
-
307
-
308
-
309
-
310
-
311
-
312
-
313
-
314
-
315
-
316
-
317
-
318
-
319
-
320
-
321
-
322
-
323
-
324
-
325
-
326
-
327
-
328
-
329
-
330
-
331
-
332
-
333
-
334
-
335
-
336
-
337
-
338
-
339
-
340
-
341
 |
 |
