Adobe 65045315 Photoshop Elements Manual - Page 148
Apply the Threshold filter
 |
UPC - 883919176512
View all Adobe 65045315 manuals
Add to My Manuals
Save this manual to your list of manuals |
Page 148 highlights
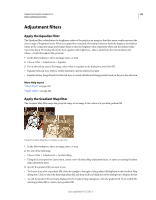
USING PHOTOSHOP ELEMENTS 10 142 Color and tonal correction • From the Layers panel or Layer menu, create a new Posterize adjustment layer, or open an existing Posterize adjustment layer. 3 Enter the number of tonal levels you want, and click OK. More Help topics "About filters" on page 200 "Apply a filter" on page 202 "About adjustment and fill layers" on page 76 Apply the Threshold filter The Threshold filter converts grayscale or color images into high-contrast, black-and-white images. You can specify a certain level as a threshold. All pixels lighter than the threshold are converted to white; and all pixels darker are converted to black. The Threshold command is useful for determining the lightest and darkest areas of an image. 1 In the Edit workspace, select an image, layer, or area. 2 Do one of the following: • Choose Filter > Adjustments > Threshold. • From the Layers panel or Layer menu, create a new Threshold adjustment layer, or open an existing Threshold adjustment layer. The Threshold dialog box displays a histogram of the luminance levels of the pixels in the current selection. 3 Select Preview and do any of the following: • To change the image to black and white, drag the slider below the histogram until the threshold level you want appears at the top of the dialog box, and click OK. As you drag, the image changes to reflect the new threshold setting. • To identify a representative highlight, drag the slider to the right until the image is pure black. Then drag the slider back until some solid white areas appear in the image. • To identify a representative shadow, drag the slider to the left until the image is pure white. Then drag the slider back until some solid black areas appear in the image. 4 (Optional) To return to default settings, hold down Alt (Option in Mac OS) and click Reset. 5 (Optional) Click Cancel to close the Threshold dialog box without applying changes to the image. More Help topics "About filters" on page 200 "Apply a filter" on page 202 "About adjustment and fill layers" on page 76 Last updated 1/2/2012
-
 1
1 -
2
-
3
-
4
-
5
-
6
-
7
-
8
-
9
-
10
-
11
-
12
-
13
-
14
-
15
-
16
-
17
-
18
-
19
-
20
-
21
-
22
-
23
-
24
-
25
-
26
-
27
-
28
-
29
-
30
-
31
-
32
-
33
-
34
-
35
-
36
-
37
-
38
-
39
-
40
-
41
-
42
-
43
-
44
-
45
-
46
-
47
-
48
-
49
-
50
-
51
-
52
-
53
-
54
-
55
-
56
-
57
-
58
-
59
-
60
-
61
-
62
-
63
-
64
-
65
-
66
-
67
-
68
-
69
-
70
-
71
-
72
-
73
-
74
-
75
-
76
-
77
-
78
-
79
-
80
-
81
-
82
-
83
-
84
-
85
-
86
-
87
-
88
-
89
-
90
-
91
-
92
-
93
-
94
-
95
-
96
-
97
-
98
-
99
-
100
-
101
-
102
-
103
-
104
-
105
-
106
-
107
-
108
-
109
-
110
-
111
-
112
-
113
-
114
-
115
-
116
-
117
-
118
-
119
-
120
-
121
-
122
-
123
-
124
-
125
-
126
-
127
-
128
-
129
-
130
-
131
-
132
-
133
-
134
-
135
-
136
-
137
-
138
-
139
-
140
-
141
-
142
-
 143
143 -
 144
144 -
 145
145 -
 146
146 -
 147
147 -
 148
148 -
 149
149 -
 150
150 -
 151
151 -
 152
152 -
 153
153 -
154
-
155
-
156
-
157
-
158
-
159
-
160
-
161
-
162
-
163
-
164
-
165
-
166
-
167
-
168
-
169
-
170
-
171
-
172
-
173
-
174
-
175
-
176
-
177
-
178
-
179
-
180
-
181
-
182
-
183
-
184
-
185
-
186
-
187
-
188
-
189
-
190
-
191
-
192
-
193
-
194
-
195
-
196
-
197
-
198
-
199
-
200
-
201
-
202
-
203
-
204
-
205
-
206
-
207
-
208
-
209
-
210
-
211
-
212
-
213
-
214
-
215
-
216
-
217
-
218
-
219
-
220
-
221
-
222
-
223
-
224
-
225
-
226
-
227
-
228
-
229
-
230
-
231
-
232
-
233
-
234
-
235
-
236
-
237
-
238
-
239
-
240
-
241
-
242
-
243
-
244
-
245
-
246
-
247
-
248
-
249
-
250
-
251
-
252
-
253
-
254
-
255
-
256
-
257
-
258
-
259
-
260
-
261
-
262
-
263
-
264
-
265
-
266
-
267
-
268
-
269
-
270
-
271
-
272
-
273
-
274
-
275
-
276
-
277
-
278
-
279
-
280
-
281
-
282
-
283
-
284
-
285
-
286
-
287
-
288
-
289
-
290
-
291
-
292
-
293
-
294
-
295
-
296
-
297
-
298
-
299
-
300
-
301
-
302
-
303
-
304
-
305
-
306
-
307
-
308
-
309
-
310
-
311
-
312
-
313
-
314
-
315
-
316
-
317
-
318
-
319
-
320
-
321
-
322
-
323
-
324
-
325
-
326
-
327
-
328
-
329
-
330
-
331
-
332
-
333
-
334
-
335
-
336
-
337
-
338
-
339
-
340
-
341
 |
 |
