Adobe 65045315 Photoshop Elements Manual - Page 309
Add photos using the Print dialog box, Photos Currently In Browser, Entire Catalog, Album, Keyword Tag
 |
UPC - 883919176512
View all Adobe 65045315 manuals
Add to My Manuals
Save this manual to your list of manuals |
Page 309 highlights
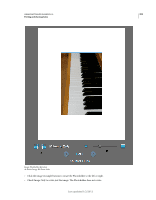
USING PHOTOSHOP ELEMENTS 10 303 Printing and sharing photos 5 (Windows only) Click the Change Settings button to modify the printer settings. You can change the following settings in the Change Settings dialog box: • Printer • Paper Type • Paper Tray • Paper Size • Print Quality 6 Select the size of the paper from the Paper Size drop-down list. 7 Select one of the options from the Select Type Of Print drop-down list. 8 Select a print size from the Select Print Size drop-down list. 9 Select or enter a number in the Print copies of each page text box. 10 To fit the individual image to the specified print layout, select Crop To Fit. The image is scaled and, if necessary, cropped to match the aspect ratio of the print layout. Deselect this option if you don't want your photos cropped. 11 To place the image at a specific location, deselect the Center Image check box and specify Top and Left values. Leave the option selected if you want the image to appear at the center. If you pan the image inside the photo holder or drag the photo holder, the Center Image check box gets deselected automatically. Note: The default unit for Top and Left values is inches. You can choose any other unit from the predefined list of units. 12 (Optional) Click More Options to change additional settings. 13 Click Print. If your photos are not printing at a particular size, try resizing the photo to the specific dimensions you want before you print. More Help topics "Set page and printer options" on page 308 "Change print dimensions and resolution without resampling" on page 153 Add photos using the Print dialog box 1 In the Print dialog box, click the Add button. 2 In the Add Photos dialog box, select one of the following: Photos Currently In Browser Displays photos currently visible in the Media Browser. Entire Catalog Displays all photos in your catalog. Album Displays photos from a specific album. Use the menu to select an album. Keyword Tag Displays photos with a specific tag. Use the menu to select a tag. Only Show Photos with Ratings Displays only photos marked with the Favorites tag. Also Show Hidden Photos Displays photos marked as hidden. 3 Click one or more thumbnails, or click Select All, and then click Add Selected Photos. 4 Click Done. Last updated 1/2/2012
-
 1
1 -
2
-
3
-
4
-
5
-
6
-
7
-
8
-
9
-
10
-
11
-
12
-
13
-
14
-
15
-
16
-
17
-
18
-
19
-
20
-
21
-
22
-
23
-
24
-
25
-
26
-
27
-
28
-
29
-
30
-
31
-
32
-
33
-
34
-
35
-
36
-
37
-
38
-
39
-
40
-
41
-
42
-
43
-
44
-
45
-
46
-
47
-
48
-
49
-
50
-
51
-
52
-
53
-
54
-
55
-
56
-
57
-
58
-
59
-
60
-
61
-
62
-
63
-
64
-
65
-
66
-
67
-
68
-
69
-
70
-
71
-
72
-
73
-
74
-
75
-
76
-
77
-
78
-
79
-
80
-
81
-
82
-
83
-
84
-
85
-
86
-
87
-
88
-
89
-
90
-
91
-
92
-
93
-
94
-
95
-
96
-
97
-
98
-
99
-
100
-
101
-
102
-
103
-
104
-
105
-
106
-
107
-
108
-
109
-
110
-
111
-
112
-
113
-
114
-
115
-
116
-
117
-
118
-
119
-
120
-
121
-
122
-
123
-
124
-
125
-
126
-
127
-
128
-
129
-
130
-
131
-
132
-
133
-
134
-
135
-
136
-
137
-
138
-
139
-
140
-
141
-
142
-
143
-
144
-
145
-
146
-
147
-
148
-
149
-
150
-
151
-
152
-
153
-
154
-
155
-
156
-
157
-
158
-
159
-
160
-
161
-
162
-
163
-
164
-
165
-
166
-
167
-
168
-
169
-
170
-
171
-
172
-
173
-
174
-
175
-
176
-
177
-
178
-
179
-
180
-
181
-
182
-
183
-
184
-
185
-
186
-
187
-
188
-
189
-
190
-
191
-
192
-
193
-
194
-
195
-
196
-
197
-
198
-
199
-
200
-
201
-
202
-
203
-
204
-
205
-
206
-
207
-
208
-
209
-
210
-
211
-
212
-
213
-
214
-
215
-
216
-
217
-
218
-
219
-
220
-
221
-
222
-
223
-
224
-
225
-
226
-
227
-
228
-
229
-
230
-
231
-
232
-
233
-
234
-
235
-
236
-
237
-
238
-
239
-
240
-
241
-
242
-
243
-
244
-
245
-
246
-
247
-
248
-
249
-
250
-
251
-
252
-
253
-
254
-
255
-
256
-
257
-
258
-
259
-
260
-
261
-
262
-
263
-
264
-
265
-
266
-
267
-
268
-
269
-
270
-
271
-
272
-
273
-
274
-
275
-
276
-
277
-
278
-
279
-
280
-
281
-
282
-
283
-
284
-
285
-
286
-
287
-
288
-
289
-
290
-
291
-
292
-
293
-
294
-
295
-
296
-
297
-
298
-
299
-
300
-
301
-
302
-
303
-
 304
304 -
 305
305 -
 306
306 -
 307
307 -
 308
308 -
 309
309 -
 310
310 -
 311
311 -
 312
312 -
 313
313 -
 314
314 -
315
-
316
-
317
-
318
-
319
-
320
-
321
-
322
-
323
-
324
-
325
-
326
-
327
-
328
-
329
-
330
-
331
-
332
-
333
-
334
-
335
-
336
-
337
-
338
-
339
-
340
-
341
 |
 |
