Adobe 65045315 Photoshop Elements Manual - Page 19
Share photos using email, Back up/synchronize files
 |
UPC - 883919176512
View all Adobe 65045315 manuals
Add to My Manuals
Save this manual to your list of manuals |
Page 19 highlights
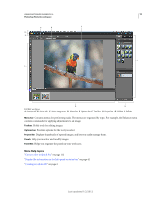
USING PHOTOSHOP ELEMENTS 10 13 Getting started Share photos using email Photoshop Elements streamlines sharing photos by email. You can either attach photos to an email or, in Windows, embed a photo in an email using Photo Mail. 1 Make sure that your email client is specified in Preferences. In Windows, choose Edit > Preferences > Sharing. Note: In Mac OS, you can find the Preferences option in the Adobe Elements 10 Organizer menu. 2 In Windows, choose Microsoft Outlook®, Outlook Express, or Adobe email Service. In Mac OS, choose Entourage or Mail. Note: In Windows Vista® or Windows 7®, choose Microsoft Outlook®, Windows Live Mail®, or Adobe email Service. 3 Select a photo in the Media Browser, and then click Share and Email Attachments. 4 To add more items to the email, select them in the Media Browser, then click the Add button . Note: You can also remove items by selecting them in the Items list, and then clicking the Remove button . 5 Choose an option from the Maximum Photo Size menu, and use the Quality slider to adjust image clarity. 6 Click Next. 7 Type a message in the Message text box. 8 Select recipients of the email by doing one of the following: • Select a name from the Select Recipients list (the names you see are from your contact book). • If you want, add the recipient to your contact book by selecting New Contact in the Contact Book dialog. Click OK; the recipient appears selected in the Select Recipients list. 9 Click Next. Photoshop Elements opens the message in your default email application. What if I use a web-based email service? If you use a web-based email service such as Gmail™ or Yahoo® Mail, you can export your photos and attach them to email messages. Click the Share tab, and select Email Attachments. The Email Attachments wizard leads you through the steps for creating versions of your photos that are suitable for email. Back up/synchronize files Note: Adobe® Photoshop® Elements 10 free online benefits and Photoshop Elements Plus are available in the United States only. Internet access required. When you sign in with your Adobe ID, you can back up your albums and catalogs to Photoshop.com servers. Backing up and synchronizing your albums and catalogs is essential for protecting your photos and media files. For example, if you add keyword tags to media files on your computer, the corresponding photos on Photoshop.com are updated with the tags. The Backup/Synchronization wizard is automatically launched when the user activates Backup/Synchronization for the first time. Last updated 1/2/2012
-
 1
1 -
2
-
3
-
4
-
5
-
6
-
7
-
8
-
9
-
10
-
11
-
12
-
13
-
 14
14 -
 15
15 -
 16
16 -
 17
17 -
 18
18 -
 19
19 -
 20
20 -
 21
21 -
 22
22 -
 23
23 -
 24
24 -
25
-
26
-
27
-
28
-
29
-
30
-
31
-
32
-
33
-
34
-
35
-
36
-
37
-
38
-
39
-
40
-
41
-
42
-
43
-
44
-
45
-
46
-
47
-
48
-
49
-
50
-
51
-
52
-
53
-
54
-
55
-
56
-
57
-
58
-
59
-
60
-
61
-
62
-
63
-
64
-
65
-
66
-
67
-
68
-
69
-
70
-
71
-
72
-
73
-
74
-
75
-
76
-
77
-
78
-
79
-
80
-
81
-
82
-
83
-
84
-
85
-
86
-
87
-
88
-
89
-
90
-
91
-
92
-
93
-
94
-
95
-
96
-
97
-
98
-
99
-
100
-
101
-
102
-
103
-
104
-
105
-
106
-
107
-
108
-
109
-
110
-
111
-
112
-
113
-
114
-
115
-
116
-
117
-
118
-
119
-
120
-
121
-
122
-
123
-
124
-
125
-
126
-
127
-
128
-
129
-
130
-
131
-
132
-
133
-
134
-
135
-
136
-
137
-
138
-
139
-
140
-
141
-
142
-
143
-
144
-
145
-
146
-
147
-
148
-
149
-
150
-
151
-
152
-
153
-
154
-
155
-
156
-
157
-
158
-
159
-
160
-
161
-
162
-
163
-
164
-
165
-
166
-
167
-
168
-
169
-
170
-
171
-
172
-
173
-
174
-
175
-
176
-
177
-
178
-
179
-
180
-
181
-
182
-
183
-
184
-
185
-
186
-
187
-
188
-
189
-
190
-
191
-
192
-
193
-
194
-
195
-
196
-
197
-
198
-
199
-
200
-
201
-
202
-
203
-
204
-
205
-
206
-
207
-
208
-
209
-
210
-
211
-
212
-
213
-
214
-
215
-
216
-
217
-
218
-
219
-
220
-
221
-
222
-
223
-
224
-
225
-
226
-
227
-
228
-
229
-
230
-
231
-
232
-
233
-
234
-
235
-
236
-
237
-
238
-
239
-
240
-
241
-
242
-
243
-
244
-
245
-
246
-
247
-
248
-
249
-
250
-
251
-
252
-
253
-
254
-
255
-
256
-
257
-
258
-
259
-
260
-
261
-
262
-
263
-
264
-
265
-
266
-
267
-
268
-
269
-
270
-
271
-
272
-
273
-
274
-
275
-
276
-
277
-
278
-
279
-
280
-
281
-
282
-
283
-
284
-
285
-
286
-
287
-
288
-
289
-
290
-
291
-
292
-
293
-
294
-
295
-
296
-
297
-
298
-
299
-
300
-
301
-
302
-
303
-
304
-
305
-
306
-
307
-
308
-
309
-
310
-
311
-
312
-
313
-
314
-
315
-
316
-
317
-
318
-
319
-
320
-
321
-
322
-
323
-
324
-
325
-
326
-
327
-
328
-
329
-
330
-
331
-
332
-
333
-
334
-
335
-
336
-
337
-
338
-
339
-
340
-
341
 |
 |