Adobe 65045315 Photoshop Elements Manual - Page 43
Place a PDF, Adobe Illustrator, or EPS file in a new layer, Constrain Proportions.
 |
UPC - 883919176512
View all Adobe 65045315 manuals
Add to My Manuals
Save this manual to your list of manuals |
Page 43 highlights
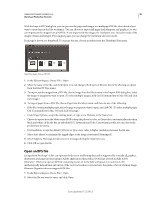
USING PHOTOSHOP ELEMENTS 10 37 Working in Photoshop Elements 3 Indicate the desired dimensions, resolution, and mode. To maintain the same height-to-width ratio, select Constrain Proportions. 4 Select Anti-aliased to minimize the jagged appearance of edges, and then click OK. Anti-aliasing lets you produce smooth-edged objects by blending the edges of the objects into the background. You can also bring PostScript artwork into Photoshop Elements using the Place command and the Paste command. Place a PDF, Adobe Illustrator, or EPS file in a new layer You can place PDF, Adobe® Illustrator®, or EPS files into a new layer in an image. Because the placed artwork is rasterized (bitmapped), you cannot edit text or vector data in placed artwork. The artwork is rasterized at the resolution of the file into which it is placed. 1 In the Edit workspace, open the image into which you want to place the artwork. 2 Choose File > Place, select the file you want to place, and click Place. 3 If you are placing a PDF file that contains multiple pages, select the page you want to place from the provided dialog box, and click OK. The placed artwork appears inside a bounding box at the center of the Photoshop Elements image. The artwork maintains its original aspect ratio; however, if the artwork is larger than the Photoshop Elements image, it is resized to fit. 4 (Optional) Reposition the placed artwork by positioning the pointer inside the bounding box of the placed artwork and dragging. 5 (Optional) Scale the placed artwork by doing one or more of the following: • Drag one of the handles at the corners or sides of the bounding box. Hold down Shift as you drag a corner handle to constrain the proportions. • In the options bar, enter values for W and H to specify the width and height of the artwork. By default, these options represent scale as a percentage. However, you can enter a different unit of measurement-in (inches), cm (centimeters), or px (pixels). To constrain the proportions of the artwork, click the Constrain Proportions box. This option is on when the icon has a white background. 6 (Optional) Rotate the placed artwork by doing one or more of the following: • Position the pointer outside the bounding box of the placed artwork (the pointer turns into a curved arrow), and drag. • In the options bar, enter a value (in degrees) for the Rotation option . 7 (Optional) Skew the placed artwork by holding down Ctrl (Command in Mac OS) and dragging a side handle of the bounding box. 8 Set the Anti-alias option in the options bar. To blend edge pixels during rasterization, select the Anti-alias option. To produce a hard-edged transition between edge pixels during rasterization, deselect the Anti-alias option. 9 To commit the placed artwork to a new layer, do one of the following: • Click the Commit button . • Press Enter. To cancel the placement, click the Cancel button , or press Esc. Last updated 1/2/2012
-
 1
1 -
2
-
3
-
4
-
5
-
6
-
7
-
8
-
9
-
10
-
11
-
12
-
13
-
14
-
15
-
16
-
17
-
18
-
19
-
20
-
21
-
22
-
23
-
24
-
25
-
26
-
27
-
28
-
29
-
30
-
31
-
32
-
33
-
34
-
35
-
36
-
37
-
 38
38 -
 39
39 -
 40
40 -
 41
41 -
 42
42 -
 43
43 -
 44
44 -
 45
45 -
 46
46 -
 47
47 -
 48
48 -
49
-
50
-
51
-
52
-
53
-
54
-
55
-
56
-
57
-
58
-
59
-
60
-
61
-
62
-
63
-
64
-
65
-
66
-
67
-
68
-
69
-
70
-
71
-
72
-
73
-
74
-
75
-
76
-
77
-
78
-
79
-
80
-
81
-
82
-
83
-
84
-
85
-
86
-
87
-
88
-
89
-
90
-
91
-
92
-
93
-
94
-
95
-
96
-
97
-
98
-
99
-
100
-
101
-
102
-
103
-
104
-
105
-
106
-
107
-
108
-
109
-
110
-
111
-
112
-
113
-
114
-
115
-
116
-
117
-
118
-
119
-
120
-
121
-
122
-
123
-
124
-
125
-
126
-
127
-
128
-
129
-
130
-
131
-
132
-
133
-
134
-
135
-
136
-
137
-
138
-
139
-
140
-
141
-
142
-
143
-
144
-
145
-
146
-
147
-
148
-
149
-
150
-
151
-
152
-
153
-
154
-
155
-
156
-
157
-
158
-
159
-
160
-
161
-
162
-
163
-
164
-
165
-
166
-
167
-
168
-
169
-
170
-
171
-
172
-
173
-
174
-
175
-
176
-
177
-
178
-
179
-
180
-
181
-
182
-
183
-
184
-
185
-
186
-
187
-
188
-
189
-
190
-
191
-
192
-
193
-
194
-
195
-
196
-
197
-
198
-
199
-
200
-
201
-
202
-
203
-
204
-
205
-
206
-
207
-
208
-
209
-
210
-
211
-
212
-
213
-
214
-
215
-
216
-
217
-
218
-
219
-
220
-
221
-
222
-
223
-
224
-
225
-
226
-
227
-
228
-
229
-
230
-
231
-
232
-
233
-
234
-
235
-
236
-
237
-
238
-
239
-
240
-
241
-
242
-
243
-
244
-
245
-
246
-
247
-
248
-
249
-
250
-
251
-
252
-
253
-
254
-
255
-
256
-
257
-
258
-
259
-
260
-
261
-
262
-
263
-
264
-
265
-
266
-
267
-
268
-
269
-
270
-
271
-
272
-
273
-
274
-
275
-
276
-
277
-
278
-
279
-
280
-
281
-
282
-
283
-
284
-
285
-
286
-
287
-
288
-
289
-
290
-
291
-
292
-
293
-
294
-
295
-
296
-
297
-
298
-
299
-
300
-
301
-
302
-
303
-
304
-
305
-
306
-
307
-
308
-
309
-
310
-
311
-
312
-
313
-
314
-
315
-
316
-
317
-
318
-
319
-
320
-
321
-
322
-
323
-
324
-
325
-
326
-
327
-
328
-
329
-
330
-
331
-
332
-
333
-
334
-
335
-
336
-
337
-
338
-
339
-
340
-
341
 |
 |
