Adobe 65045315 Photoshop Elements Manual - Page 131
Modify Smart Brush tool correction settings, Change the Smart Brush tool correction preset
 |
UPC - 883919176512
View all Adobe 65045315 manuals
Add to My Manuals
Save this manual to your list of manuals |
Page 131 highlights
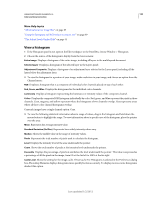
USING PHOTOSHOP ELEMENTS 10 125 Color and tonal correction 5 (Optional) Do any of the following: • To add the current adjustment to more areas of the photo, paint or drag in the image. If necessary, make sure Add To Selection is selected. • To remove parts of the current adjustment, select Subtract From Selection and paint in the image. • To apply a different type of adjustment, select New Selection , select a preset from the pop-up panel, and then paint in the image. • To smooth the edges of the selection, click Refine Edges in the options bar, adjust the settings in the dialog box, and then click OK. For more information, see "Smoothing selection edges with anti-aliasing and feathering" on page 106. Note: If you use a different tool from the toolbox and then return to the Smart Brush tool or Detail Smart Brush tool, the last adjustment you applied is active. 6 (Optional) If you have multiple adjustments, do one of the following to select the adjustment you want to add to, subtract from, or modify: • Click a pin. • Right-click in the photo and choose the adjustment listed in the bottom portion of the menu. Modify Smart Brush tool correction settings 1 Do any of the following: • In the image, right-click a pin or an active selection and choose Change Adjustment Settings. • In the Layers panel, double-click the layer thumbnail for the specific adjustment layer. • Double-click a pin. 2 Adjust the settings in the dialog box and then click OK. Change the Smart Brush tool correction preset 1 Click a pin or active selection and then open the preset pop-up panel in the options bar. 2 Choose an adjustment preset from the pop-up panel. Delete a Smart Brush tool correction ❖ Right-click a pin or an active selection and choose Delete Adjustment. Note: In the Layers panel, you can also delete a Smart Brush tool correction by deleting the specific adjustment layer. Smart Brush pop-up panel Photoshop Elements lets you apply many different preset adjustments using the Smart Brush tool and the Detail Smart Brush tool . You pick an adjustment from the preset pop-up panel in the options bar. Like all pop-up panels, the Smart Brush preset pop-up panel can be configured. Use the panel menu to display the adjustments as thumbnails or in a list. You can also drag the picker out of the options bar so it floats where you want it in the workspace. Specific sets of adjustments or all adjustments can be viewed by choosing from a menu near the upper-left area of the panel. The adjustments range from tonal and corrections. About Levels adjustments The Levels dialog box is a powerful tonal and color-adjustment tool. You can make levels adjustments in the entire image or a selected portion. (To access the dialog box, choose Enhance > Adjust Lighting > Levels.) Last updated 1/2/2012
-
 1
1 -
2
-
3
-
4
-
5
-
6
-
7
-
8
-
9
-
10
-
11
-
12
-
13
-
14
-
15
-
16
-
17
-
18
-
19
-
20
-
21
-
22
-
23
-
24
-
25
-
26
-
27
-
28
-
29
-
30
-
31
-
32
-
33
-
34
-
35
-
36
-
37
-
38
-
39
-
40
-
41
-
42
-
43
-
44
-
45
-
46
-
47
-
48
-
49
-
50
-
51
-
52
-
53
-
54
-
55
-
56
-
57
-
58
-
59
-
60
-
61
-
62
-
63
-
64
-
65
-
66
-
67
-
68
-
69
-
70
-
71
-
72
-
73
-
74
-
75
-
76
-
77
-
78
-
79
-
80
-
81
-
82
-
83
-
84
-
85
-
86
-
87
-
88
-
89
-
90
-
91
-
92
-
93
-
94
-
95
-
96
-
97
-
98
-
99
-
100
-
101
-
102
-
103
-
104
-
105
-
106
-
107
-
108
-
109
-
110
-
111
-
112
-
113
-
114
-
115
-
116
-
117
-
118
-
119
-
120
-
121
-
122
-
123
-
124
-
125
-
 126
126 -
 127
127 -
 128
128 -
 129
129 -
 130
130 -
 131
131 -
 132
132 -
 133
133 -
 134
134 -
 135
135 -
 136
136 -
137
-
138
-
139
-
140
-
141
-
142
-
143
-
144
-
145
-
146
-
147
-
148
-
149
-
150
-
151
-
152
-
153
-
154
-
155
-
156
-
157
-
158
-
159
-
160
-
161
-
162
-
163
-
164
-
165
-
166
-
167
-
168
-
169
-
170
-
171
-
172
-
173
-
174
-
175
-
176
-
177
-
178
-
179
-
180
-
181
-
182
-
183
-
184
-
185
-
186
-
187
-
188
-
189
-
190
-
191
-
192
-
193
-
194
-
195
-
196
-
197
-
198
-
199
-
200
-
201
-
202
-
203
-
204
-
205
-
206
-
207
-
208
-
209
-
210
-
211
-
212
-
213
-
214
-
215
-
216
-
217
-
218
-
219
-
220
-
221
-
222
-
223
-
224
-
225
-
226
-
227
-
228
-
229
-
230
-
231
-
232
-
233
-
234
-
235
-
236
-
237
-
238
-
239
-
240
-
241
-
242
-
243
-
244
-
245
-
246
-
247
-
248
-
249
-
250
-
251
-
252
-
253
-
254
-
255
-
256
-
257
-
258
-
259
-
260
-
261
-
262
-
263
-
264
-
265
-
266
-
267
-
268
-
269
-
270
-
271
-
272
-
273
-
274
-
275
-
276
-
277
-
278
-
279
-
280
-
281
-
282
-
283
-
284
-
285
-
286
-
287
-
288
-
289
-
290
-
291
-
292
-
293
-
294
-
295
-
296
-
297
-
298
-
299
-
300
-
301
-
302
-
303
-
304
-
305
-
306
-
307
-
308
-
309
-
310
-
311
-
312
-
313
-
314
-
315
-
316
-
317
-
318
-
319
-
320
-
321
-
322
-
323
-
324
-
325
-
326
-
327
-
328
-
329
-
330
-
331
-
332
-
333
-
334
-
335
-
336
-
337
-
338
-
339
-
340
-
341
 |
 |
