Adobe 65045315 Photoshop Elements Manual - Page 230

Other filters, Custom filters, Apply a Custom filter, High Pass

Page 230 highlights

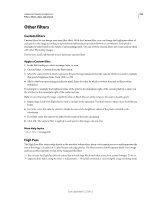
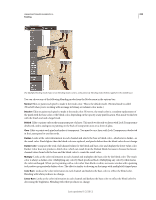
USING PHOTOSHOP ELEMENTS 10 224 Filters, effects, styles, and artwork Other filters Custom filters Custom filters let you design your own filter effect. With the Custom filter, you can change the brightness values of each pixel in the image according to a predefined mathematical operation known as convolution. Each pixel is reassigned a value based on the values of surrounding pixels. You can save the custom filters you create and use them with other Photoshop images. Use the Save and Load buttons to save and reuse custom filters. Apply a Custom filter 1 In the Edit workspace, select an image, layer, or area. 2 Choose Other > Custom from the Filter menu. 3 Select the center text box, which represents the pixel being evaluated. Enter the value by which you want to multiply that pixel's brightness value, from -999 to +999. 4 Select a text box representing an adjacent pixel. Enter the value by which you want the pixel in this position multiplied. For example, to multiply the brightness value of the pixel to the immediate right of the current pixel by 2, enter 2 in the text box to the immediate right of the center text box. Note: To avoid turning the image completely white or black, the sum of the values in the matrix should equal 1. 5 Repeat steps 3 and 4 for all pixels you want to include in the operation. You don't have to enter values in all the text boxes. 6 For Scale, enter the value by which to divide the sum of the brightness values of the pixels included in the calculation. 7 For Offset, enter the value to be added to the result of the scale calculation. 8 Click OK. The custom filter is applied to each pixel in the image, one at a time. More Help topics "About filters" on page 200 High Pass The High Pass filter retains edge details in the specified radius where sharp color transitions occur and suppresses the rest of the image. (A radius of 0.1 pixel keeps only edge pixels.) The filter removes low-frequency detail in an image and has an effect opposite to that of the Gaussian Blur filter. You can use the High Pass filter to extract line art and large black-and-white areas from scanned images. To do so, apply the filter before using the Filter > Adjustments > Threshold command or converting the image to bitmap mode. Last updated 1/2/2012

  • 1
  • 2
  • 3
  • 4
  • 5
  • 6
  • 7
  • 8
  • 9
  • 10
  • 11
  • 12
  • 13
  • 14
  • 15
  • 16
  • 17
  • 18
  • 19
  • 20
  • 21
  • 22
  • 23
  • 24
  • 25
  • 26
  • 27
  • 28
  • 29
  • 30
  • 31
  • 32
  • 33
  • 34
  • 35
  • 36
  • 37
  • 38
  • 39
  • 40
  • 41
  • 42
  • 43
  • 44
  • 45
  • 46
  • 47
  • 48
  • 49
  • 50
  • 51
  • 52
  • 53
  • 54
  • 55
  • 56
  • 57
  • 58
  • 59
  • 60
  • 61
  • 62
  • 63
  • 64
  • 65
  • 66
  • 67
  • 68
  • 69
  • 70
  • 71
  • 72
  • 73
  • 74
  • 75
  • 76
  • 77
  • 78
  • 79
  • 80
  • 81
  • 82
  • 83
  • 84
  • 85
  • 86
  • 87
  • 88
  • 89
  • 90
  • 91
  • 92
  • 93
  • 94
  • 95
  • 96
  • 97
  • 98
  • 99
  • 100
  • 101
  • 102
  • 103
  • 104
  • 105
  • 106
  • 107
  • 108
  • 109
  • 110
  • 111
  • 112
  • 113
  • 114
  • 115
  • 116
  • 117
  • 118
  • 119
  • 120
  • 121
  • 122
  • 123
  • 124
  • 125
  • 126
  • 127
  • 128
  • 129
  • 130
  • 131
  • 132
  • 133
  • 134
  • 135
  • 136
  • 137
  • 138
  • 139
  • 140
  • 141
  • 142
  • 143
  • 144
  • 145
  • 146
  • 147
  • 148
  • 149
  • 150
  • 151
  • 152
  • 153
  • 154
  • 155
  • 156
  • 157
  • 158
  • 159
  • 160
  • 161
  • 162
  • 163
  • 164
  • 165
  • 166
  • 167
  • 168
  • 169
  • 170
  • 171
  • 172
  • 173
  • 174
  • 175
  • 176
  • 177
  • 178
  • 179
  • 180
  • 181
  • 182
  • 183
  • 184
  • 185
  • 186
  • 187
  • 188
  • 189
  • 190
  • 191
  • 192
  • 193
  • 194
  • 195
  • 196
  • 197
  • 198
  • 199
  • 200
  • 201
  • 202
  • 203
  • 204
  • 205
  • 206
  • 207
  • 208
  • 209
  • 210
  • 211
  • 212
  • 213
  • 214
  • 215
  • 216
  • 217
  • 218
  • 219
  • 220
  • 221
  • 222
  • 223
  • 224
  • 225
  • 226
  • 227
  • 228
  • 229
  • 230
  • 231
  • 232
  • 233
  • 234
  • 235
  • 236
  • 237
  • 238
  • 239
  • 240
  • 241
  • 242
  • 243
  • 244
  • 245
  • 246
  • 247
  • 248
  • 249
  • 250
  • 251
  • 252
  • 253
  • 254
  • 255
  • 256
  • 257
  • 258
  • 259
  • 260
  • 261
  • 262
  • 263
  • 264
  • 265
  • 266
  • 267
  • 268
  • 269
  • 270
  • 271
  • 272
  • 273
  • 274
  • 275
  • 276
  • 277
  • 278
  • 279
  • 280
  • 281
  • 282
  • 283
  • 284
  • 285
  • 286
  • 287
  • 288
  • 289
  • 290
  • 291
  • 292
  • 293
  • 294
  • 295
  • 296
  • 297
  • 298
  • 299
  • 300
  • 301
  • 302
  • 303
  • 304
  • 305
  • 306
  • 307
  • 308
  • 309
  • 310
  • 311
  • 312
  • 313
  • 314
  • 315
  • 316
  • 317
  • 318
  • 319
  • 320
  • 321
  • 322
  • 323
  • 324
  • 325
  • 326
  • 327
  • 328
  • 329
  • 330
  • 331
  • 332
  • 333
  • 334
  • 335
  • 336
  • 337
  • 338
  • 339
  • 340
  • 341

224
USING PHOTOSHOP ELEMENTS 10
Filters, effects, styles, and artwork
Last updated 1/2/2012
Other filters
Custom filters
Custom filters let you design your own filter effect. With the Custom filter, you can change the brightness values of
each pixel in the image according to a predefined mathematical operation known as convolution. Each pixel is
reassigned a value based on the values of surrounding pixels. You can save the custom filters you create and use them
with other Photoshop images.
Use the Save and Load buttons to save and reuse custom filters.
Apply a Custom filter
1
In the Edit workspace, select an image, layer, or area.
2
Choose Other
> Custom from the Filter menu.
3
Select the center text box, which represents the pixel being evaluated. Enter the value by which you want to multiply
that pixel’s brightness value, from -999 to +999.
4
Select a text box representing an adjacent pixel. Enter the value by which you want the pixel in this position
multiplied.
For example, to multiply the brightness value of the pixel to the immediate right of the current pixel by 2, enter 2 in
the text box to the immediate right of the center text box.
Note:
To avoid turning the image completely white or black, the sum of the values in the matrix should equal 1.
5
Repeat steps 3 and 4 for all pixels you want to include in the operation. You don’t have to enter values in all the text
boxes.
6
For Scale, enter the value by which to divide the sum of the brightness values of the pixels included in the
calculation.
7
For Offset, enter the value to be added to the result of the scale calculation.
8
Click OK. The custom filter is applied to each pixel in the image, one at a time.
More Help topics
About filters
” on page
200
High Pass
The High Pass filter retains edge details in the specified radius where sharp color transitions occur and suppresses the
rest of the image. (A radius of 0.1 pixel keeps only edge pixels.) The filter removes low-frequency detail in an image
and has an effect opposite to that of the Gaussian Blur filter.
You can use the High Pass filter to extract line art and large black-and-white areas from scanned images. To do so,
apply the filter before using the Filter
> Adjustments
> Threshold command or converting the image to bitmap mode.