Adobe 65045315 Photoshop Elements Manual - Page 265
Choose a font family and style, Choose a font size, Select the Horizontal Type tool
 |
UPC - 883919176512
View all Adobe 65045315 manuals
Add to My Manuals
Save this manual to your list of manuals |
Page 265 highlights
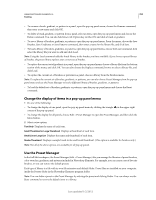
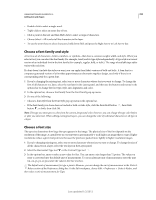
USING PHOTOSHOP ELEMENTS 10 259 Adding text and shapes • Double-click to select a single word. • Triple-click to select an entire line of text. • Click a point in the text and then Shift-click to select a range of characters. • Choose Select > All to select all the characters in the layer. • To use the arrow keys to select characters, hold down Shift and press the Right Arrow or Left Arrow key. Choose a font family and style A font is a set of characters-letters, numbers, or symbols-that share a common weight, width, and style. When you select a font, you can select the font family (for example, Arial) and its type style independently. A type style is a variant version of an individual font in the font family (for example, regular, bold, or italic). The range of available type styles varies with each font. If a font doesn't include the style you want, you can apply faux (fake) versions of bold and italic. A faux font is a computer-generated version of a font that approximates an alternative typeface design, used only if there is no corresponding style for a given font. 1 If you're changing the existing text, select one or more characters whose font you want to change. To change the font of all characters in a layer, select the text layer in the Layers panel, and then use the buttons and menus in the options bar to change the font type, style, size, alignment, and color. 2 In the options bar, choose a font family from the Font Family pop-up menu. 3 Do one of the following: • Choose a font style from the Font Style pop-up menu in the options bar. • If the font family you chose does not include a bold or italic style, click the Faux Bold button , Faux Italic button , or both; then click OK. Note: The type you enter gets its color from the current foreground color; however, you can change the type color before or after you enter text. When editing existing text layers, you can change the color of individual characters or all type in a layer. Choose a font size The type size determines how large the type appears in the image. The physical size of the font depends on the resolution of the image. A capital letter in 72-point text is approximately 1-inch high in an image that is 72 ppi. Higher resolutions reduce a given text point size because the pixels are packed more tightly in higher resolution images. 1 If you're changing existing text, select one or more characters whose size you want to change. To change the size of all the characters in a layer, select the text layer in the Layers panel. 2 Select the Horizontal Type tool or the Vertical Type tool . 3 In the options bar, enter or select a new value for Size. You can enter a size larger than 72 points. The value you enter is converted into the default unit of measurement. To use an alternate unit of measurement, enter the unit (in, cm, pt, px, or pica) after the value in the Size text box. The default unit of measurement for type is points. However, you can change the unit of measurement in the Units & Rulers section of the Preferences dialog box. In the Edit workspace, choose Edit > Preferences > Units & Rulers, and then select a unit of measurement for Type. Last updated 1/2/2012
-
 1
1 -
2
-
3
-
4
-
5
-
6
-
7
-
8
-
9
-
10
-
11
-
12
-
13
-
14
-
15
-
16
-
17
-
18
-
19
-
20
-
21
-
22
-
23
-
24
-
25
-
26
-
27
-
28
-
29
-
30
-
31
-
32
-
33
-
34
-
35
-
36
-
37
-
38
-
39
-
40
-
41
-
42
-
43
-
44
-
45
-
46
-
47
-
48
-
49
-
50
-
51
-
52
-
53
-
54
-
55
-
56
-
57
-
58
-
59
-
60
-
61
-
62
-
63
-
64
-
65
-
66
-
67
-
68
-
69
-
70
-
71
-
72
-
73
-
74
-
75
-
76
-
77
-
78
-
79
-
80
-
81
-
82
-
83
-
84
-
85
-
86
-
87
-
88
-
89
-
90
-
91
-
92
-
93
-
94
-
95
-
96
-
97
-
98
-
99
-
100
-
101
-
102
-
103
-
104
-
105
-
106
-
107
-
108
-
109
-
110
-
111
-
112
-
113
-
114
-
115
-
116
-
117
-
118
-
119
-
120
-
121
-
122
-
123
-
124
-
125
-
126
-
127
-
128
-
129
-
130
-
131
-
132
-
133
-
134
-
135
-
136
-
137
-
138
-
139
-
140
-
141
-
142
-
143
-
144
-
145
-
146
-
147
-
148
-
149
-
150
-
151
-
152
-
153
-
154
-
155
-
156
-
157
-
158
-
159
-
160
-
161
-
162
-
163
-
164
-
165
-
166
-
167
-
168
-
169
-
170
-
171
-
172
-
173
-
174
-
175
-
176
-
177
-
178
-
179
-
180
-
181
-
182
-
183
-
184
-
185
-
186
-
187
-
188
-
189
-
190
-
191
-
192
-
193
-
194
-
195
-
196
-
197
-
198
-
199
-
200
-
201
-
202
-
203
-
204
-
205
-
206
-
207
-
208
-
209
-
210
-
211
-
212
-
213
-
214
-
215
-
216
-
217
-
218
-
219
-
220
-
221
-
222
-
223
-
224
-
225
-
226
-
227
-
228
-
229
-
230
-
231
-
232
-
233
-
234
-
235
-
236
-
237
-
238
-
239
-
240
-
241
-
242
-
243
-
244
-
245
-
246
-
247
-
248
-
249
-
250
-
251
-
252
-
253
-
254
-
255
-
256
-
257
-
258
-
259
-
 260
260 -
 261
261 -
 262
262 -
 263
263 -
 264
264 -
 265
265 -
 266
266 -
 267
267 -
 268
268 -
 269
269 -
 270
270 -
271
-
272
-
273
-
274
-
275
-
276
-
277
-
278
-
279
-
280
-
281
-
282
-
283
-
284
-
285
-
286
-
287
-
288
-
289
-
290
-
291
-
292
-
293
-
294
-
295
-
296
-
297
-
298
-
299
-
300
-
301
-
302
-
303
-
304
-
305
-
306
-
307
-
308
-
309
-
310
-
311
-
312
-
313
-
314
-
315
-
316
-
317
-
318
-
319
-
320
-
321
-
322
-
323
-
324
-
325
-
326
-
327
-
328
-
329
-
330
-
331
-
332
-
333
-
334
-
335
-
336
-
337
-
338
-
339
-
340
-
341
 |
 |
