Adobe 65045315 Photoshop Elements Manual - Page 315
Send photos to online sharing services, Sharing photos
 |
UPC - 883919176512
View all Adobe 65045315 manuals
Add to My Manuals
Save this manual to your list of manuals |
Page 315 highlights
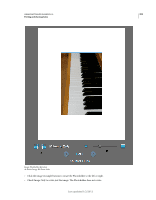
USING PHOTOSHOP ELEMENTS 10 309 Printing and sharing photos 2 In the Page Setup dialog box, click the Printer button and choose a printer from the Name menu. If necessary, click the Properties button to specify layout and paper options. You can click the Advanced button in the printer driver dialog box (if it's available) to set other printer options. The availability of the Advanced button and printer options depends on your printer, print drivers, and Windows. Click OK to close the dialog boxes. Note: If you plan to scale the printed image, use the scaling options in the Print Preview dialog box rather than the printer's advanced options. The Print dialog box is more helpful because it shows you a preview of the scaled image. Also, you don't want to set the scaling options in both the printer's advanced options and the Print Preview dialog box. This setting applies scaling twice, and the resulting image may not be the size you intended. 3 In the Page Setup dialog box, specify options, such as paper size and orientation, and then click OK. Send photos to online sharing services 1 In the Edit workspace, click the Share tab . 2 Click More Options, and choose one of the photo sharing services from the pop-up menu. 3 Follow the onscreen directions to share your photos online. Sharing photos Photoshop Elements enables you to share photos by e-mail. You can either attach photos to an e-mail or embed a photo in an e-mail using Photo Mail. You can also share online albums and share photos by burning them to a CD/DVD. Since Elements Organizer enables efficient organization and management of media files, you can start the share operation in Photoshop Elements and complete it in Elements Organizer. Elements Organizer enables you to select the required media files for sharing. The Share tab in the Photoshop Elements provides the following options to share photos: Online Album Enables you to share the albums. E-mail Attachments Enables you to share photos as e-mail attachments. Photo Mail Enables you to use a wizard to embed your photos in the body of an e-mail message, with colorful custom layouts (stationery). Note: Photo Mail is not supported in Mac OS. Share To Flickr Enables you to upload photos on Flickr. Share To Facebook Enables you to upload photos on Facebook. Send To SmugMug Gallery Enables you to upload photos on SmugMug Gallery. You can also share images using online services. Note: For a video about sharing files by e-mail, see www.adobe.com/go/lrvid914_pse_en Last updated 1/2/2012
-
 1
1 -
2
-
3
-
4
-
5
-
6
-
7
-
8
-
9
-
10
-
11
-
12
-
13
-
14
-
15
-
16
-
17
-
18
-
19
-
20
-
21
-
22
-
23
-
24
-
25
-
26
-
27
-
28
-
29
-
30
-
31
-
32
-
33
-
34
-
35
-
36
-
37
-
38
-
39
-
40
-
41
-
42
-
43
-
44
-
45
-
46
-
47
-
48
-
49
-
50
-
51
-
52
-
53
-
54
-
55
-
56
-
57
-
58
-
59
-
60
-
61
-
62
-
63
-
64
-
65
-
66
-
67
-
68
-
69
-
70
-
71
-
72
-
73
-
74
-
75
-
76
-
77
-
78
-
79
-
80
-
81
-
82
-
83
-
84
-
85
-
86
-
87
-
88
-
89
-
90
-
91
-
92
-
93
-
94
-
95
-
96
-
97
-
98
-
99
-
100
-
101
-
102
-
103
-
104
-
105
-
106
-
107
-
108
-
109
-
110
-
111
-
112
-
113
-
114
-
115
-
116
-
117
-
118
-
119
-
120
-
121
-
122
-
123
-
124
-
125
-
126
-
127
-
128
-
129
-
130
-
131
-
132
-
133
-
134
-
135
-
136
-
137
-
138
-
139
-
140
-
141
-
142
-
143
-
144
-
145
-
146
-
147
-
148
-
149
-
150
-
151
-
152
-
153
-
154
-
155
-
156
-
157
-
158
-
159
-
160
-
161
-
162
-
163
-
164
-
165
-
166
-
167
-
168
-
169
-
170
-
171
-
172
-
173
-
174
-
175
-
176
-
177
-
178
-
179
-
180
-
181
-
182
-
183
-
184
-
185
-
186
-
187
-
188
-
189
-
190
-
191
-
192
-
193
-
194
-
195
-
196
-
197
-
198
-
199
-
200
-
201
-
202
-
203
-
204
-
205
-
206
-
207
-
208
-
209
-
210
-
211
-
212
-
213
-
214
-
215
-
216
-
217
-
218
-
219
-
220
-
221
-
222
-
223
-
224
-
225
-
226
-
227
-
228
-
229
-
230
-
231
-
232
-
233
-
234
-
235
-
236
-
237
-
238
-
239
-
240
-
241
-
242
-
243
-
244
-
245
-
246
-
247
-
248
-
249
-
250
-
251
-
252
-
253
-
254
-
255
-
256
-
257
-
258
-
259
-
260
-
261
-
262
-
263
-
264
-
265
-
266
-
267
-
268
-
269
-
270
-
271
-
272
-
273
-
274
-
275
-
276
-
277
-
278
-
279
-
280
-
281
-
282
-
283
-
284
-
285
-
286
-
287
-
288
-
289
-
290
-
291
-
292
-
293
-
294
-
295
-
296
-
297
-
298
-
299
-
300
-
301
-
302
-
303
-
304
-
305
-
306
-
307
-
308
-
309
-
 310
310 -
 311
311 -
 312
312 -
 313
313 -
 314
314 -
 315
315 -
 316
316 -
 317
317 -
 318
318 -
 319
319 -
 320
320 -
321
-
322
-
323
-
324
-
325
-
326
-
327
-
328
-
329
-
330
-
331
-
332
-
333
-
334
-
335
-
336
-
337
-
338
-
339
-
340
-
341
 |
 |
