Adobe 65045315 Photoshop Elements Manual - Page 276
Draw a custom shape, Create multiple shapes in the same layer, Unconstrained, Defined Proportions
 |
UPC - 883919176512
View all Adobe 65045315 manuals
Add to My Manuals
Save this manual to your list of manuals |
Page 276 highlights
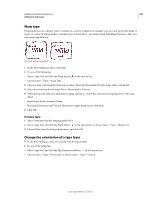
USING PHOTOSHOP ELEMENTS 10 270 Adding text and shapes Draw a custom shape The Custom Shape tool provides many different shape options for you to draw. When you select the custom shape tool, you can access these shapes in the options bar. 1 In the Edit workspace, select the Custom Shape tool . If necessary, press and hold another shape tool in the toolbox, and then choose this tool from the list that appears. 2 In the options bar, select a shape from the Shape pop-up panel. Click the arrow at the top right of the panel to list the shapes you can choose from and how to display them. 3 (Optional) In the options bar, select the Geometry options triangle to use the following options: Unconstrained Lets you set the width and height of a rectangle, rounded rectangle, ellipse, or custom shape by dragging. Defined Proportions Draws a custom shape based on the proportions with which it was created. Defined Size Draws a custom shape based on the size at which it was created. Fixed Size Draws a custom shape as a fixed shape based on the values you enter in the Width and Height text boxes. From Center Draws a custom shape from the center. 4 Drag within your image to draw the shape. The Custom Shape tool has ready-made frames that you can drag around a photo. Create multiple shapes in the same layer 1 In the Edit workspace, select a shape layer in the Layers panel or create a new shape layer. 2 If you want to create a different type of shape, select a different shape tool. 3 Select a shape area option to determine how shapes should overlap, and then drag within the image to draw new shapes: Add Adds an additional shape to the existing shape. The combined shape will cover the entire area of the shapes you drew using the Add option. Subtract Removes the area where shapes overlap. The rest of the shapes' areas are preserved. Intersect Shows only the area where shapes intersect. The other areas will be removed. Exclude Removes the overlapping areas in the new and existing shapes. Last updated 1/2/2012
-
 1
1 -
2
-
3
-
4
-
5
-
6
-
7
-
8
-
9
-
10
-
11
-
12
-
13
-
14
-
15
-
16
-
17
-
18
-
19
-
20
-
21
-
22
-
23
-
24
-
25
-
26
-
27
-
28
-
29
-
30
-
31
-
32
-
33
-
34
-
35
-
36
-
37
-
38
-
39
-
40
-
41
-
42
-
43
-
44
-
45
-
46
-
47
-
48
-
49
-
50
-
51
-
52
-
53
-
54
-
55
-
56
-
57
-
58
-
59
-
60
-
61
-
62
-
63
-
64
-
65
-
66
-
67
-
68
-
69
-
70
-
71
-
72
-
73
-
74
-
75
-
76
-
77
-
78
-
79
-
80
-
81
-
82
-
83
-
84
-
85
-
86
-
87
-
88
-
89
-
90
-
91
-
92
-
93
-
94
-
95
-
96
-
97
-
98
-
99
-
100
-
101
-
102
-
103
-
104
-
105
-
106
-
107
-
108
-
109
-
110
-
111
-
112
-
113
-
114
-
115
-
116
-
117
-
118
-
119
-
120
-
121
-
122
-
123
-
124
-
125
-
126
-
127
-
128
-
129
-
130
-
131
-
132
-
133
-
134
-
135
-
136
-
137
-
138
-
139
-
140
-
141
-
142
-
143
-
144
-
145
-
146
-
147
-
148
-
149
-
150
-
151
-
152
-
153
-
154
-
155
-
156
-
157
-
158
-
159
-
160
-
161
-
162
-
163
-
164
-
165
-
166
-
167
-
168
-
169
-
170
-
171
-
172
-
173
-
174
-
175
-
176
-
177
-
178
-
179
-
180
-
181
-
182
-
183
-
184
-
185
-
186
-
187
-
188
-
189
-
190
-
191
-
192
-
193
-
194
-
195
-
196
-
197
-
198
-
199
-
200
-
201
-
202
-
203
-
204
-
205
-
206
-
207
-
208
-
209
-
210
-
211
-
212
-
213
-
214
-
215
-
216
-
217
-
218
-
219
-
220
-
221
-
222
-
223
-
224
-
225
-
226
-
227
-
228
-
229
-
230
-
231
-
232
-
233
-
234
-
235
-
236
-
237
-
238
-
239
-
240
-
241
-
242
-
243
-
244
-
245
-
246
-
247
-
248
-
249
-
250
-
251
-
252
-
253
-
254
-
255
-
256
-
257
-
258
-
259
-
260
-
261
-
262
-
263
-
264
-
265
-
266
-
267
-
268
-
269
-
270
-
 271
271 -
 272
272 -
 273
273 -
 274
274 -
 275
275 -
 276
276 -
 277
277 -
 278
278 -
 279
279 -
 280
280 -
 281
281 -
282
-
283
-
284
-
285
-
286
-
287
-
288
-
289
-
290
-
291
-
292
-
293
-
294
-
295
-
296
-
297
-
298
-
299
-
300
-
301
-
302
-
303
-
304
-
305
-
306
-
307
-
308
-
309
-
310
-
311
-
312
-
313
-
314
-
315
-
316
-
317
-
318
-
319
-
320
-
321
-
322
-
323
-
324
-
325
-
326
-
327
-
328
-
329
-
330
-
331
-
332
-
333
-
334
-
335
-
336
-
337
-
338
-
339
-
340
-
341
 |
 |
