Adobe 65045315 Photoshop Elements Manual - Page 258
Create a noise gradient, Roughness, Color Model
 |
UPC - 883919176512
View all Adobe 65045315 manuals
Add to My Manuals
Save this manual to your list of manuals |
Page 258 highlights
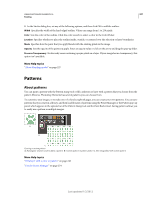
USING PHOTOSHOP ELEMENTS 10 252 Painting 2 To adjust the starting opacity in the Gradient Editor, click the left opacity stop above the gradient bar. The triangle below the stop turns black, indicating that you're editing the starting transparency. 3 Set the Opacity by doing one of the following: • Enter a value between 0 (fully transparent) and 100% (fully opaque). • Drag the arrow on the Opacity pop-up slider. 4 To adjust the opacity of the endpoint, click the right transparency stop above the gradient bar. Then set the opacity as described in step 3. 5 To adjust the location of the starting or ending opacity, do one of the following: • Drag the corresponding opacity stop to the left or right. • Select the corresponding opacity stop, and enter a value for Location. 6 To adjust the location of the midpoint opacity (the point midway between the starting and ending opacities), do one of the following: • Drag the diamond above the gradient bar to the left or right. • Select the diamond, and enter a value for Location. 7 To delete the opacity stop you are editing, click Delete, or drag the stop away from the gradient bar. 8 To add an intermediate opacity, click above the gradient bar to define a new opacity stop. You can then adjust and move this opacity as you would a starting or ending opacity. To remove an intermediate opacity, drag its transparency stop up and off the gradient bar, or select the stop and click the Delete button. 9 To save the gradient to the gradient presets, enter a new name in the Name text box, and then click New. This creates a new gradient preset with the transparency setting you specified. 10 Click OK to exit the dialog box and select the newly created gradient. Make sure that Transparency is selected in the options bar. Create a noise gradient A noise gradient is a gradient that contains randomly distributed colors within a range of colors that you specify. A B C Noise gradients with different noise values. A. 10% noise B. 50% noise C. 90% noise 1 In the Edit workspace, select the Gradient tool . 2 To display the Gradient Editor dialog box, click the Edit button in the options bar. 3 Choose Noise from the Gradient Type menu. 4 Set options for the gradient. Roughness Sets the amount of softness in the transition between colors in the pattern. Color Model Specifies the color model to use to set the color range to include in the gradient. To define the range of colors, drag the sliders for each color component. Last updated 1/2/2012
-
 1
1 -
2
-
3
-
4
-
5
-
6
-
7
-
8
-
9
-
10
-
11
-
12
-
13
-
14
-
15
-
16
-
17
-
18
-
19
-
20
-
21
-
22
-
23
-
24
-
25
-
26
-
27
-
28
-
29
-
30
-
31
-
32
-
33
-
34
-
35
-
36
-
37
-
38
-
39
-
40
-
41
-
42
-
43
-
44
-
45
-
46
-
47
-
48
-
49
-
50
-
51
-
52
-
53
-
54
-
55
-
56
-
57
-
58
-
59
-
60
-
61
-
62
-
63
-
64
-
65
-
66
-
67
-
68
-
69
-
70
-
71
-
72
-
73
-
74
-
75
-
76
-
77
-
78
-
79
-
80
-
81
-
82
-
83
-
84
-
85
-
86
-
87
-
88
-
89
-
90
-
91
-
92
-
93
-
94
-
95
-
96
-
97
-
98
-
99
-
100
-
101
-
102
-
103
-
104
-
105
-
106
-
107
-
108
-
109
-
110
-
111
-
112
-
113
-
114
-
115
-
116
-
117
-
118
-
119
-
120
-
121
-
122
-
123
-
124
-
125
-
126
-
127
-
128
-
129
-
130
-
131
-
132
-
133
-
134
-
135
-
136
-
137
-
138
-
139
-
140
-
141
-
142
-
143
-
144
-
145
-
146
-
147
-
148
-
149
-
150
-
151
-
152
-
153
-
154
-
155
-
156
-
157
-
158
-
159
-
160
-
161
-
162
-
163
-
164
-
165
-
166
-
167
-
168
-
169
-
170
-
171
-
172
-
173
-
174
-
175
-
176
-
177
-
178
-
179
-
180
-
181
-
182
-
183
-
184
-
185
-
186
-
187
-
188
-
189
-
190
-
191
-
192
-
193
-
194
-
195
-
196
-
197
-
198
-
199
-
200
-
201
-
202
-
203
-
204
-
205
-
206
-
207
-
208
-
209
-
210
-
211
-
212
-
213
-
214
-
215
-
216
-
217
-
218
-
219
-
220
-
221
-
222
-
223
-
224
-
225
-
226
-
227
-
228
-
229
-
230
-
231
-
232
-
233
-
234
-
235
-
236
-
237
-
238
-
239
-
240
-
241
-
242
-
243
-
244
-
245
-
246
-
247
-
248
-
249
-
250
-
251
-
252
-
 253
253 -
 254
254 -
 255
255 -
 256
256 -
 257
257 -
 258
258 -
 259
259 -
 260
260 -
 261
261 -
 262
262 -
 263
263 -
264
-
265
-
266
-
267
-
268
-
269
-
270
-
271
-
272
-
273
-
274
-
275
-
276
-
277
-
278
-
279
-
280
-
281
-
282
-
283
-
284
-
285
-
286
-
287
-
288
-
289
-
290
-
291
-
292
-
293
-
294
-
295
-
296
-
297
-
298
-
299
-
300
-
301
-
302
-
303
-
304
-
305
-
306
-
307
-
308
-
309
-
310
-
311
-
312
-
313
-
314
-
315
-
316
-
317
-
318
-
319
-
320
-
321
-
322
-
323
-
324
-
325
-
326
-
327
-
328
-
329
-
330
-
331
-
332
-
333
-
334
-
335
-
336
-
337
-
338
-
339
-
340
-
341
 |
 |
