VMware 4817V62 Administration Guide - Page 178
Optional Select Generate New Security ID SID and click, Optional On
 |
View all VMware 4817V62 manuals
Add to My Manuals
Save this manual to your list of manuals |
Page 178 highlights
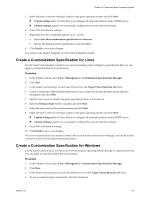
vSphere Basic System Administration 5 Under Customization Specification Information, enter a name for the specification and an optional description, and click Next. 6 Enter the virtual machine owner's name and organization and click Next. This information appears in the guest operating system System Properties. 7 Type the name that will identify the guest operating system on the network and click Next. 8 Type the Windows product key for the new guest operating system. 9 (Optional) If you are customizing a server guest operating system: a Select Include Server License Information. b Select either Per seat or Per server. For Per server, enter the maximum number of simultaneous connections you want the server to accept. 10 Click Next. 11 Type a password for the administrator account, and confirm the password by typing it again. NOTE You can change the administrator password only if the administrator password on the source Windows virtual machine is blank. If the source Windows virtual machine or template already has a password, the administrator password does not change. 12 To log users into the guest operating system as Administrator, select the check box, and select the number of times to log in automatically. 13 Click Next. 14 Select the time zone for the virtual machine and click Next. 15 (Optional) On the Run Once page, specify commands to be run the first time a user logs into the guest operating system and click Next. 16 Select the type of network settings to apply to the guest operating system and click Next: n Typical settings allow vCenter Server to configure all network interfaces from a DHCP server. n Custom settings require you to manually configure the network interface settings. 17 Select how the virtual machine will participate in the network and clickNext. n Workgroup (for example, MSHOME) n Windows Server Domain: Type the domain, the user name, and the password for a user account that has permission to add a computer to the specified domain. 18 (Optional) Select Generate New Security ID (SID) and click Next. 19 Click Finish to save your changes. The custom specification you created is listed in the Customization Specification Manager. You can use it to customize virtual machine guest operating systems. 178 VMware, Inc.
-
 1
1 -
2
-
3
-
4
-
5
-
6
-
7
-
8
-
9
-
10
-
11
-
12
-
13
-
14
-
15
-
16
-
17
-
18
-
19
-
20
-
21
-
22
-
23
-
24
-
25
-
26
-
27
-
28
-
29
-
30
-
31
-
32
-
33
-
34
-
35
-
36
-
37
-
38
-
39
-
40
-
41
-
42
-
43
-
44
-
45
-
46
-
47
-
48
-
49
-
50
-
51
-
52
-
53
-
54
-
55
-
56
-
57
-
58
-
59
-
60
-
61
-
62
-
63
-
64
-
65
-
66
-
67
-
68
-
69
-
70
-
71
-
72
-
73
-
74
-
75
-
76
-
77
-
78
-
79
-
80
-
81
-
82
-
83
-
84
-
85
-
86
-
87
-
88
-
89
-
90
-
91
-
92
-
93
-
94
-
95
-
96
-
97
-
98
-
99
-
100
-
101
-
102
-
103
-
104
-
105
-
106
-
107
-
108
-
109
-
110
-
111
-
112
-
113
-
114
-
115
-
116
-
117
-
118
-
119
-
120
-
121
-
122
-
123
-
124
-
125
-
126
-
127
-
128
-
129
-
130
-
131
-
132
-
133
-
134
-
135
-
136
-
137
-
138
-
139
-
140
-
141
-
142
-
143
-
144
-
145
-
146
-
147
-
148
-
149
-
150
-
151
-
152
-
153
-
154
-
155
-
156
-
157
-
158
-
159
-
160
-
161
-
162
-
163
-
164
-
165
-
166
-
167
-
168
-
169
-
170
-
171
-
172
-
 173
173 -
 174
174 -
 175
175 -
 176
176 -
 177
177 -
 178
178 -
 179
179 -
 180
180 -
 181
181 -
 182
182 -
 183
183 -
184
-
185
-
186
-
187
-
188
-
189
-
190
-
191
-
192
-
193
-
194
-
195
-
196
-
197
-
198
-
199
-
200
-
201
-
202
-
203
-
204
-
205
-
206
-
207
-
208
-
209
-
210
-
211
-
212
-
213
-
214
-
215
-
216
-
217
-
218
-
219
-
220
-
221
-
222
-
223
-
224
-
225
-
226
-
227
-
228
-
229
-
230
-
231
-
232
-
233
-
234
-
235
-
236
-
237
-
238
-
239
-
240
-
241
-
242
-
243
-
244
-
245
-
246
-
247
-
248
-
249
-
250
-
251
-
252
-
253
-
254
-
255
-
256
-
257
-
258
-
259
-
260
-
261
-
262
-
263
-
264
-
265
-
266
-
267
-
268
-
269
-
270
-
271
-
272
-
273
-
274
-
275
-
276
-
277
-
278
-
279
-
280
-
281
-
282
-
283
-
284
-
285
-
286
-
287
-
288
-
289
-
290
-
291
-
292
-
293
-
294
-
295
-
296
-
297
-
298
-
299
-
300
-
301
-
302
-
303
-
304
-
305
-
306
-
307
-
308
-
309
-
310
-
311
-
312
-
313
-
314
-
315
-
316
-
317
-
318
-
319
-
320
-
321
-
322
-
323
-
324
-
325
-
326
-
327
-
328
-
329
-
330
-
331
-
332
-
333
-
334
-
335
-
336
-
337
-
338
-
339
-
340
-
341
-
342
-
343
-
344
-
345
-
346
-
347
-
348
-
349
-
350
-
351
-
352
-
353
-
354
-
355
-
356
-
357
-
358
-
359
-
360
-
361
-
362
-
363
-
364
 |
 |