Brother International WP7550JPLUS Owner's Manual - English - Page 113
CURSOR, Spreadsheet
 |
View all Brother International WP7550JPLUS manuals
Add to My Manuals
Save this manual to your list of manuals |
Page 113 highlights
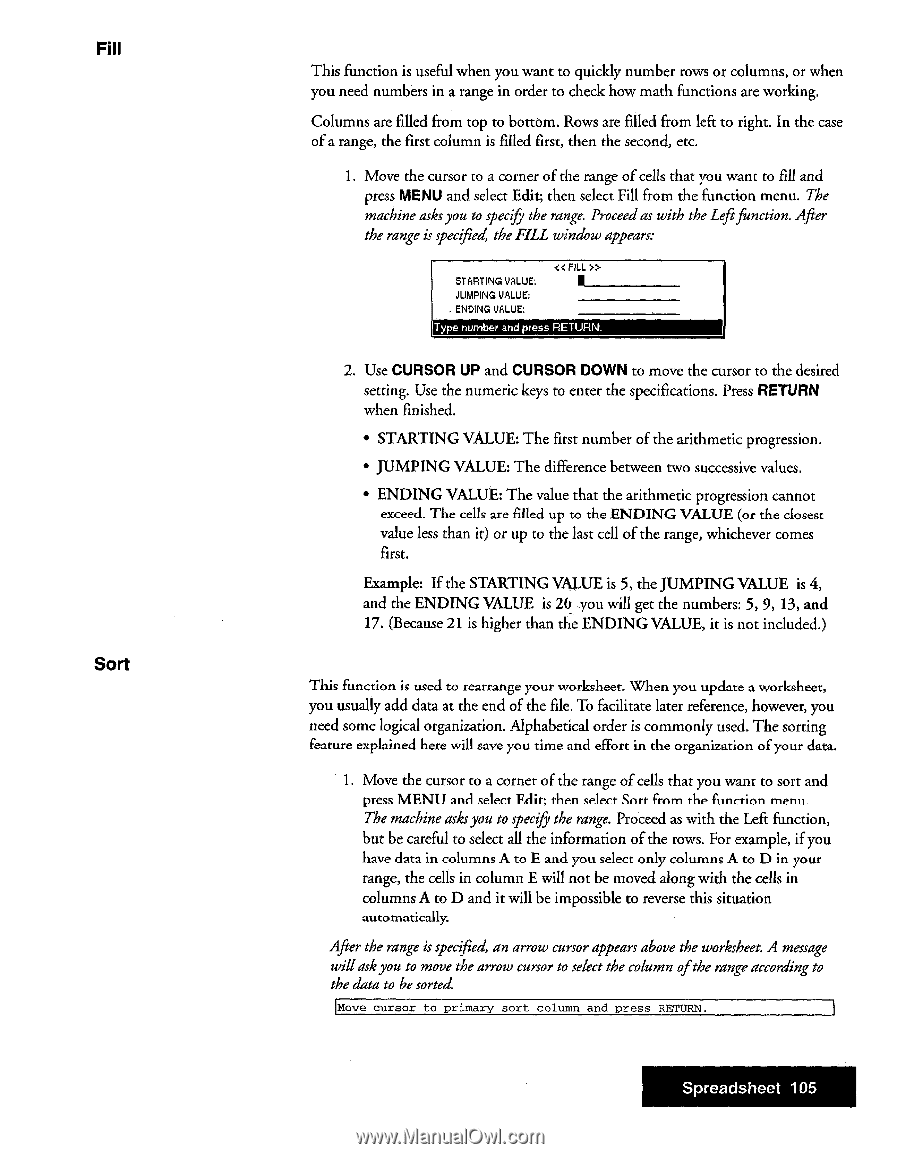
Fill Sort This function is useful when you want to quickly number rows or columns, or when you need numbers in a range in order to check how math functions are working. Columns are filled from top to bottom. Rows are filled from left to right. In the case of a range, the first column is filled first, then the second, etc. 1. Move the cursor to a corner of the range of cells that you want to fill and press MENU and select Edit; then select Fill from the function menu. The machine asksyou to specify thethe range. Proceed as with the Leftfunction. After the range is specified, the FILL window appears: STARTING VALUE. JUMPING VALUE: . ENDING VALUE: I Type number and press RETURN. 2. Use CURSOR UP and CURSOR DOWN to move the cursor to the desired setting. Use the numeric keys to enter the specifications. Press RETURN when finished. • STARTING VALUE: The first number of the arithmetic progression. • JUMPING VALUE: The difference between two successive values, • ENDING VALUE: The value that the arithmetic progression cannot exceed. The cells are filled up to the ENDING VALUE (or the closest value less than it) or up to the last cell of the range, whichever comes first. Example: If the STARTING VALUE is 5, the JUMPING VALUE is 4, and the ENDING VALUE is 26 __you will get the numbers: 5, 9, 13, and 17. (Because 21 is higher than the ENDING VALUE, it is not included.) This function is used to rearrange your worksheet. When you update a worksheet, you usually add data at the end of the file. To facilitate later reference, however, you need some logical organization. Alphabetical order is commonly used. The sorting feature explained here will save you time and effort in the organization of your data. 1, Move the cursor to a corner of the range of cells that you want to sort and press MENU and select Edit; then select Sort from the fill-lc-6cm menu. The machine asks you to specify thethe range. Proceed as with the Left function, but be careful to select all the information of the rows. For example, if you have data in columns A to E and you select only columns A to D in your range, the cells in column E will not be moved along with the cells in columns A to D and it will be impossible to reverse this situation automatically. After the range is specified, an arrow cursor appears above the worksheet. A message willaskyou to move the arrow cursor to select the column ofthe range according to the data to be sorted. Move cursor to primary sort column and press RETURN. Spreadsheet 105
-
 1
1 -
2
-
3
-
4
-
5
-
6
-
7
-
8
-
9
-
10
-
11
-
12
-
13
-
14
-
15
-
16
-
17
-
18
-
19
-
20
-
21
-
22
-
23
-
24
-
25
-
26
-
27
-
28
-
29
-
30
-
31
-
32
-
33
-
34
-
35
-
36
-
37
-
38
-
39
-
40
-
41
-
42
-
43
-
44
-
45
-
46
-
47
-
48
-
49
-
50
-
51
-
52
-
53
-
54
-
55
-
56
-
57
-
58
-
59
-
60
-
61
-
62
-
63
-
64
-
65
-
66
-
67
-
68
-
69
-
70
-
71
-
72
-
73
-
74
-
75
-
76
-
77
-
78
-
79
-
80
-
81
-
82
-
83
-
84
-
85
-
86
-
87
-
88
-
89
-
90
-
91
-
92
-
93
-
94
-
95
-
96
-
97
-
98
-
99
-
100
-
101
-
102
-
103
-
104
-
105
-
106
-
107
-
 108
108 -
 109
109 -
 110
110 -
 111
111 -
 112
112 -
 113
113 -
 114
114 -
 115
115 -
 116
116 -
 117
117 -
 118
118 -
119
-
120
-
121
-
122
-
123
-
124
-
125
-
126
-
127
-
128
-
129
-
130
-
131
-
132
-
133
-
134
-
135
-
136
-
137
-
138
-
139
-
140
-
141
-
142
-
143
-
144
-
145
-
146
-
147
-
148
-
149
-
150
-
151
-
152
-
153
-
154
-
155
-
156
-
157
-
158
-
159
-
160
-
161
-
162
-
163
-
164
-
165
-
166
-
167
-
168
-
169
-
170
-
171
-
172
-
173
-
174
-
175
-
176
-
177
-
178
-
179
-
180
-
181
-
182
-
183
-
184
-
185
-
186
-
187
-
188
-
189
-
190
-
191
-
192
-
193
-
194
-
195
-
196
-
197
-
198
-
199
-
200
-
201
-
202
-
203
-
204
-
205
-
206
-
207
-
208
-
209
-
210
-
211
-
212
-
213
-
214
-
215
-
216
-
217
-
218
-
219
-
220
-
221
-
222
-
223
-
224
-
225
-
226
-
227
-
228
-
229
-
230
-
231
-
232
-
233
-
234
-
235
-
236
-
237
-
238
-
239
-
240
-
241
-
242
-
243
-
244
-
245
-
246
-
247
-
248
-
249
-
250
-
251
-
252
 |
 |