Brother International WP7550JPLUS Owner's Manual - English - Page 17
Whisperwriter.
 |
View all Brother International WP7550JPLUS manuals
Add to My Manuals
Save this manual to your list of manuals |
Page 17 highlights
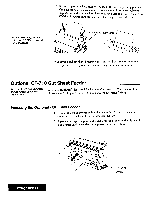
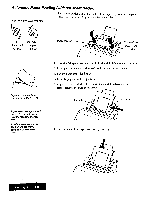
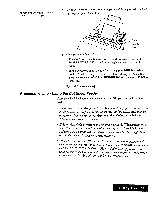
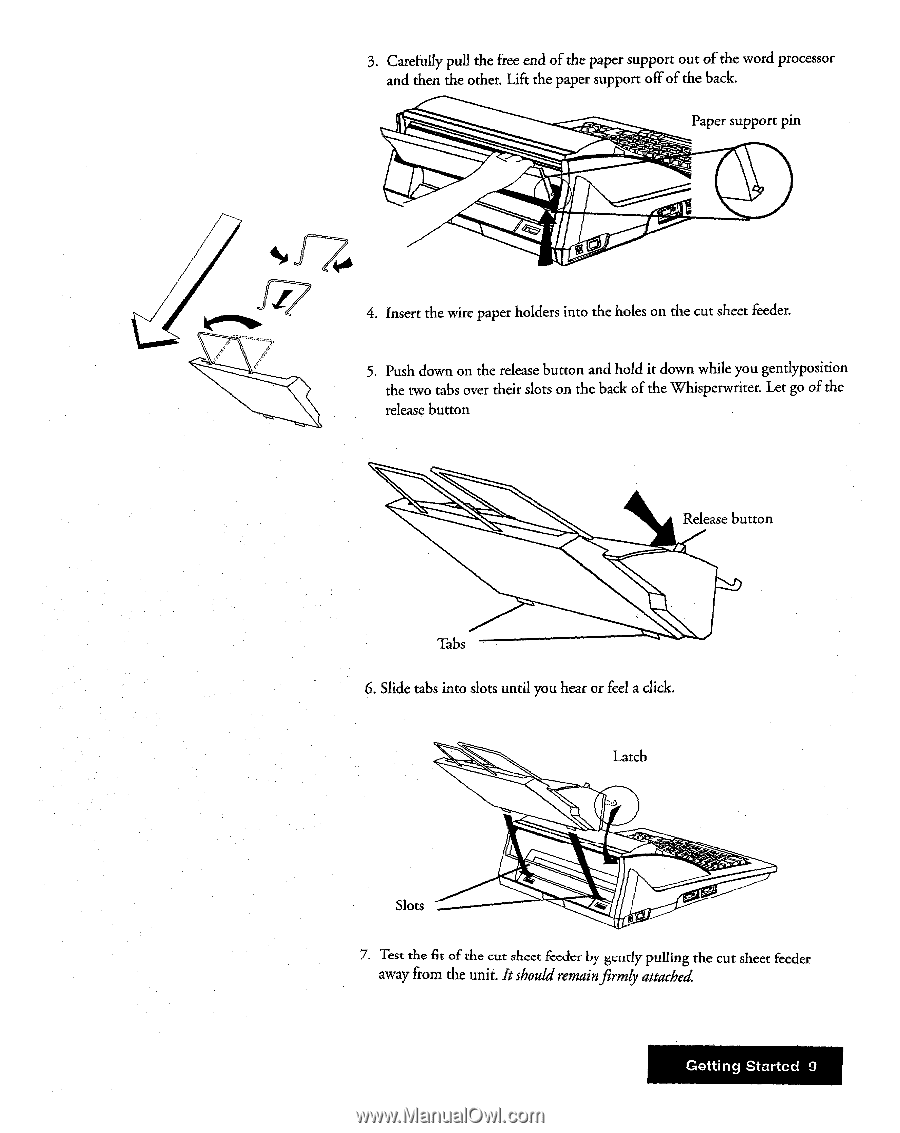
3. Carefully pull the free end of the paper support out of the word processor and then the other. Lift the paper support off of the back. Paper support pin s 4. Insert the wire paper holders into the holes on the cut sheet feeder. 5. Push down on the release button and hold it down while you gentlyposition the two tabs over their slots on the back of the Whisperwriter. Let go of the release button Release button Tabs 6. Slide tabs into slots until you hear or feel a click. Latch Slots 44> a 7. Test the fit of the cut shcct fccdcr by gcntly pulling the cut sheet feeder away from the unit. Itshould remainfirmly attached Getting Started 9
-
 1
1 -
2
-
3
-
4
-
5
-
6
-
7
-
8
-
9
-
10
-
11
-
 12
12 -
 13
13 -
 14
14 -
 15
15 -
 16
16 -
 17
17 -
 18
18 -
 19
19 -
 20
20 -
 21
21 -
 22
22 -
23
-
24
-
25
-
26
-
27
-
28
-
29
-
30
-
31
-
32
-
33
-
34
-
35
-
36
-
37
-
38
-
39
-
40
-
41
-
42
-
43
-
44
-
45
-
46
-
47
-
48
-
49
-
50
-
51
-
52
-
53
-
54
-
55
-
56
-
57
-
58
-
59
-
60
-
61
-
62
-
63
-
64
-
65
-
66
-
67
-
68
-
69
-
70
-
71
-
72
-
73
-
74
-
75
-
76
-
77
-
78
-
79
-
80
-
81
-
82
-
83
-
84
-
85
-
86
-
87
-
88
-
89
-
90
-
91
-
92
-
93
-
94
-
95
-
96
-
97
-
98
-
99
-
100
-
101
-
102
-
103
-
104
-
105
-
106
-
107
-
108
-
109
-
110
-
111
-
112
-
113
-
114
-
115
-
116
-
117
-
118
-
119
-
120
-
121
-
122
-
123
-
124
-
125
-
126
-
127
-
128
-
129
-
130
-
131
-
132
-
133
-
134
-
135
-
136
-
137
-
138
-
139
-
140
-
141
-
142
-
143
-
144
-
145
-
146
-
147
-
148
-
149
-
150
-
151
-
152
-
153
-
154
-
155
-
156
-
157
-
158
-
159
-
160
-
161
-
162
-
163
-
164
-
165
-
166
-
167
-
168
-
169
-
170
-
171
-
172
-
173
-
174
-
175
-
176
-
177
-
178
-
179
-
180
-
181
-
182
-
183
-
184
-
185
-
186
-
187
-
188
-
189
-
190
-
191
-
192
-
193
-
194
-
195
-
196
-
197
-
198
-
199
-
200
-
201
-
202
-
203
-
204
-
205
-
206
-
207
-
208
-
209
-
210
-
211
-
212
-
213
-
214
-
215
-
216
-
217
-
218
-
219
-
220
-
221
-
222
-
223
-
224
-
225
-
226
-
227
-
228
-
229
-
230
-
231
-
232
-
233
-
234
-
235
-
236
-
237
-
238
-
239
-
240
-
241
-
242
-
243
-
244
-
245
-
246
-
247
-
248
-
249
-
250
-
251
-
252
 |
 |
3.
Carefully
pull
the
free
end
of
the
paper
support
out
of
the
word
processor
and
then
the
other.
Lift
the
paper
support
off
of
the
back.
Paper
support
pin
s
4.
Insert
the
wire
paper
holders
into
the
holes
on
the
cut
sheet
feeder.
5.
Push
down
on
the
release
button
and
hold
it
down
while
you
gentlyposition
the
two
tabs
over
their
slots
on
the
back
of
the
Whisperwriter.
Let
go
of
the
release
button
Release
button
Tabs
6.
Slide
tabs
into
slots
until
you
hear
or
feel
a
click.
Latch
Slots
44>
a
7.
Test
the
fit
of
the
cut
shcct
fccdcr
by
gcntly
pulling
the
cut
sheet
feeder
away
from
the
unit.
It
should
remain
firmly
attached
Getting
Started
9