Brother International WP7550JPLUS Owner's Manual - English - Page 53
Right, Margin, Flush, Justify
 |
View all Brother International WP7550JPLUS manuals
Add to My Manuals
Save this manual to your list of manuals |
Page 53 highlights
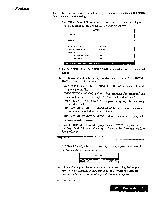
Right Margin Flush The Right Margin Flush function is used to align text flush with the right margin. You can use it to align the text being typed, or to align text that has already been typed and formatted. 1. With the cursor on the line to be aligned, press MENU. The cursor will move to the Function Menu bar. 2. Select Edit from the function menu bar; then select Right Margin Flush from the edit menu. (Short cut: CODE + R) A right marginflush symbol appears. The cursor will move to the right margin. 3. Type the text; then select press RETURN. If the line contains text, the text is alignedand the cursor waits at the endofthe line. Justify Any line that ends in a [÷-1] symbolcannot bejustified. You can use one of the following methods to release the margin formatting: • Delete the right margin flush symbol HI. • Press CODE + R a second time. • Press CANCEL. • Select Right Margin Flush from the Function Menu bar a second time. The Justify function is used to adjust the width of the blank spaces between words so that the last character of the line is exactly on the right margin. You can use this function to justify the text being typed, or to justify text that has already been formatted. 1. With the cursor on the paragraph to be justified, press MENU. The cursor willjump to thefunction menu bar 2. Select Edit from the function menu bar; then select Justify from the Function menu. (Short cut: CODE + J) The AUTO indicator on the status line will lie changed auJUST. 3. To cancel the Justify mode and resume normal typing, or to undo a justified text, proceed as in step 1. TheJUSThighlighting changes to AUTO. When you switch the Justify mode on/off, a format change symbol [El appears in the dead column at the beginning of the paragraph. The Justify On/Off mode will be valid from that point to the end of the document, or up to the next format change symbol. Word Processing 45
-
 1
1 -
2
-
3
-
4
-
5
-
6
-
7
-
8
-
9
-
10
-
11
-
12
-
13
-
14
-
15
-
16
-
17
-
18
-
19
-
20
-
21
-
22
-
23
-
24
-
25
-
26
-
27
-
28
-
29
-
30
-
31
-
32
-
33
-
34
-
35
-
36
-
37
-
38
-
39
-
40
-
41
-
42
-
43
-
44
-
45
-
46
-
47
-
 48
48 -
 49
49 -
 50
50 -
 51
51 -
 52
52 -
 53
53 -
 54
54 -
 55
55 -
 56
56 -
 57
57 -
 58
58 -
59
-
60
-
61
-
62
-
63
-
64
-
65
-
66
-
67
-
68
-
69
-
70
-
71
-
72
-
73
-
74
-
75
-
76
-
77
-
78
-
79
-
80
-
81
-
82
-
83
-
84
-
85
-
86
-
87
-
88
-
89
-
90
-
91
-
92
-
93
-
94
-
95
-
96
-
97
-
98
-
99
-
100
-
101
-
102
-
103
-
104
-
105
-
106
-
107
-
108
-
109
-
110
-
111
-
112
-
113
-
114
-
115
-
116
-
117
-
118
-
119
-
120
-
121
-
122
-
123
-
124
-
125
-
126
-
127
-
128
-
129
-
130
-
131
-
132
-
133
-
134
-
135
-
136
-
137
-
138
-
139
-
140
-
141
-
142
-
143
-
144
-
145
-
146
-
147
-
148
-
149
-
150
-
151
-
152
-
153
-
154
-
155
-
156
-
157
-
158
-
159
-
160
-
161
-
162
-
163
-
164
-
165
-
166
-
167
-
168
-
169
-
170
-
171
-
172
-
173
-
174
-
175
-
176
-
177
-
178
-
179
-
180
-
181
-
182
-
183
-
184
-
185
-
186
-
187
-
188
-
189
-
190
-
191
-
192
-
193
-
194
-
195
-
196
-
197
-
198
-
199
-
200
-
201
-
202
-
203
-
204
-
205
-
206
-
207
-
208
-
209
-
210
-
211
-
212
-
213
-
214
-
215
-
216
-
217
-
218
-
219
-
220
-
221
-
222
-
223
-
224
-
225
-
226
-
227
-
228
-
229
-
230
-
231
-
232
-
233
-
234
-
235
-
236
-
237
-
238
-
239
-
240
-
241
-
242
-
243
-
244
-
245
-
246
-
247
-
248
-
249
-
250
-
251
-
252
 |
 |