Brother International WP7550JPLUS Owner's Manual - English - Page 64
points Aa Aa
 |
View all Brother International WP7550JPLUS manuals
Add to My Manuals
Save this manual to your list of manuals |
Page 64 highlights
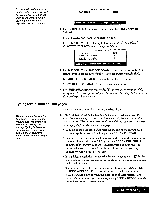
Line Spacing The Line Spacing function is used to set the vertical spacing between the lines of type. 1. Position the cursor on the line where the new format is to begin. 2. Press MENU and select Style; then select Line Spacing from the function menu. The LINE SPACING window appears: « LINE SPACING >3 LINE SPACING: MEE Press SPACE to change setting and press RETURN. 3. Use the SPACE BAR to change the line spacing as described below. LINE SPACING / AUTO1: Sets the line spacing to a standard value according to the size of the tallest character on the line. LINE SPACING / AUTO2: Sets the line spacing to a standard value according to the tallest character in a line, plus 1/12 inch. LINE SPACING 1 AUTO3: Sets the line spacing to a standard value according to the highest character in a line, plus 1/6 inch. 12 points 36 points AUTO1 4AUTO2 Fla Aa Aa Aa Aa Aa Aa Aa Aa Aa Aa Aa AUTO3 Aa Am Am Aa. Aa Aa 4. Press RETURN. Aformat change symbol[El will appear at the beginning of the paragraph. The text is reformattedfrom thatpoint to the end ofthefile or up to the nextformat change symbol Multi-Column The margins set for your document must be wide enough to accommodate all of the columns and the assigned space between the columns. if the margins are not wide enough, the prompt "Incorrect setting!" will appear. The Multi-Column function is used to print your document in newspaper fashion with up to four columns of equal width across the page. 1. After your text is typed, position the cursor at the beginning of the text to be set to multi-column. 2. Press MENU and select Style; then select Multi-Column from the function menu. The MULTI-COLUMN window appears: Word Processing 56
-
 1
1 -
2
-
3
-
4
-
5
-
6
-
7
-
8
-
9
-
10
-
11
-
12
-
13
-
14
-
15
-
16
-
17
-
18
-
19
-
20
-
21
-
22
-
23
-
24
-
25
-
26
-
27
-
28
-
29
-
30
-
31
-
32
-
33
-
34
-
35
-
36
-
37
-
38
-
39
-
40
-
41
-
42
-
43
-
44
-
45
-
46
-
47
-
48
-
49
-
50
-
51
-
52
-
53
-
54
-
55
-
56
-
57
-
58
-
 59
59 -
 60
60 -
 61
61 -
 62
62 -
 63
63 -
 64
64 -
 65
65 -
 66
66 -
 67
67 -
 68
68 -
 69
69 -
70
-
71
-
72
-
73
-
74
-
75
-
76
-
77
-
78
-
79
-
80
-
81
-
82
-
83
-
84
-
85
-
86
-
87
-
88
-
89
-
90
-
91
-
92
-
93
-
94
-
95
-
96
-
97
-
98
-
99
-
100
-
101
-
102
-
103
-
104
-
105
-
106
-
107
-
108
-
109
-
110
-
111
-
112
-
113
-
114
-
115
-
116
-
117
-
118
-
119
-
120
-
121
-
122
-
123
-
124
-
125
-
126
-
127
-
128
-
129
-
130
-
131
-
132
-
133
-
134
-
135
-
136
-
137
-
138
-
139
-
140
-
141
-
142
-
143
-
144
-
145
-
146
-
147
-
148
-
149
-
150
-
151
-
152
-
153
-
154
-
155
-
156
-
157
-
158
-
159
-
160
-
161
-
162
-
163
-
164
-
165
-
166
-
167
-
168
-
169
-
170
-
171
-
172
-
173
-
174
-
175
-
176
-
177
-
178
-
179
-
180
-
181
-
182
-
183
-
184
-
185
-
186
-
187
-
188
-
189
-
190
-
191
-
192
-
193
-
194
-
195
-
196
-
197
-
198
-
199
-
200
-
201
-
202
-
203
-
204
-
205
-
206
-
207
-
208
-
209
-
210
-
211
-
212
-
213
-
214
-
215
-
216
-
217
-
218
-
219
-
220
-
221
-
222
-
223
-
224
-
225
-
226
-
227
-
228
-
229
-
230
-
231
-
232
-
233
-
234
-
235
-
236
-
237
-
238
-
239
-
240
-
241
-
242
-
243
-
244
-
245
-
246
-
247
-
248
-
249
-
250
-
251
-
252
 |
 |
