Brother International WP7550JPLUS Owner's Manual - English - Page 207
without
 |
View all Brother International WP7550JPLUS manuals
Add to My Manuals
Save this manual to your list of manuals |
Page 207 highlights
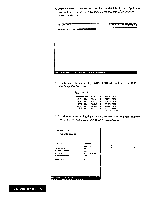
DESIGN: NUMBER OF COPIES: PAPER SIZE: CLIT SHEET FEEDER: PRINT DUALITY: « FRAME PRINT » I 71 7 •A . 4 • 1 co" 1 LET TER POPITRAI OFF FINE Ole Set FRAME TYPE, and then DESIGN. 5. Use CURSOR UP and CURSOR DOWN to move the cursor to the desired setting. Use CURSOR LEFT, CURSOR RIGHT or press SPACE BAR to change settings, or type the desired values. • FRAME TYPE : An icon shows an example of each type of frame. • DESIGN : An icon shows a example of each type of design. • NUMBER OF COPIES : The number of times the paper is to be printed (maximum 999). • PAPER SIZE : The size of paper to be printed. • CUT SHEET FEEDER / OFF : Feed paper without cut sheet feeder. CUT SHEET FEEDER / ON : Feed paper with cut sheet feeder. • PRINT QUALITY / FINE : For final quality printing. PRINT QUALITY / DRAFT : For trials. With this setting, you save time and ink. 6. Press RETURN to enter the settings of the FRAME PRINT window. This message appears: Insert paper and press RETURN. 7. Set paper according to the size setting in the FRAME PRINT window and press P INS to insert the paper. Press RETURN to start printing. This message appears: Printing....press CANCEL to stop printing. Disk Application 199
-
 1
1 -
2
-
3
-
4
-
5
-
6
-
7
-
8
-
9
-
10
-
11
-
12
-
13
-
14
-
15
-
16
-
17
-
18
-
19
-
20
-
21
-
22
-
23
-
24
-
25
-
26
-
27
-
28
-
29
-
30
-
31
-
32
-
33
-
34
-
35
-
36
-
37
-
38
-
39
-
40
-
41
-
42
-
43
-
44
-
45
-
46
-
47
-
48
-
49
-
50
-
51
-
52
-
53
-
54
-
55
-
56
-
57
-
58
-
59
-
60
-
61
-
62
-
63
-
64
-
65
-
66
-
67
-
68
-
69
-
70
-
71
-
72
-
73
-
74
-
75
-
76
-
77
-
78
-
79
-
80
-
81
-
82
-
83
-
84
-
85
-
86
-
87
-
88
-
89
-
90
-
91
-
92
-
93
-
94
-
95
-
96
-
97
-
98
-
99
-
100
-
101
-
102
-
103
-
104
-
105
-
106
-
107
-
108
-
109
-
110
-
111
-
112
-
113
-
114
-
115
-
116
-
117
-
118
-
119
-
120
-
121
-
122
-
123
-
124
-
125
-
126
-
127
-
128
-
129
-
130
-
131
-
132
-
133
-
134
-
135
-
136
-
137
-
138
-
139
-
140
-
141
-
142
-
143
-
144
-
145
-
146
-
147
-
148
-
149
-
150
-
151
-
152
-
153
-
154
-
155
-
156
-
157
-
158
-
159
-
160
-
161
-
162
-
163
-
164
-
165
-
166
-
167
-
168
-
169
-
170
-
171
-
172
-
173
-
174
-
175
-
176
-
177
-
178
-
179
-
180
-
181
-
182
-
183
-
184
-
185
-
186
-
187
-
188
-
189
-
190
-
191
-
192
-
193
-
194
-
195
-
196
-
197
-
198
-
199
-
200
-
201
-
 202
202 -
 203
203 -
 204
204 -
 205
205 -
 206
206 -
 207
207 -
 208
208 -
 209
209 -
 210
210 -
 211
211 -
 212
212 -
213
-
214
-
215
-
216
-
217
-
218
-
219
-
220
-
221
-
222
-
223
-
224
-
225
-
226
-
227
-
228
-
229
-
230
-
231
-
232
-
233
-
234
-
235
-
236
-
237
-
238
-
239
-
240
-
241
-
242
-
243
-
244
-
245
-
246
-
247
-
248
-
249
-
250
-
251
-
252
 |
 |
