Brother International WP7550JPLUS Owner's Manual - English - Page 130
Delete
 |
View all Brother International WP7550JPLUS manuals
Add to My Manuals
Save this manual to your list of manuals |
Page 130 highlights
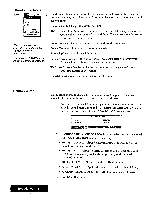
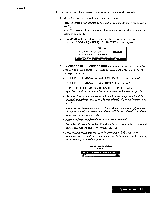
Delete Ifyou select NO, insertion is canceled. Ifyou select YES, insertion will beperformed with data lost, except i_fone or more cells among the data to he lost is protected, in which case this window appears and insertion is canceled: Protected cell error! Press any key to continue. This function removes columns or rows fi -om the worksheet. 1. Move the cursor to the first column or row that you want to delete. And press MENU and select Sheet; then select Delete from the function menu. The DELETE window appears: €€ DELETE» DELETE COLUMNS OR ROWS: MEMO NUMBER OF COLUMNSfROWS TO DELETE: 1 Press SPACE to change setting and press RETURN. 2. Use CURSOR UP and CURSOR DOWN to move the cursor to the desired setting. Use SPACE BAR to alternate between COLUMNS and ROWS, and type a number. • DELETE COLUMNS OR ROWS : COLUMNS Deletes column(s). • DELETE COLUMNS OR ROWS : ROWS Deletes row(s). • NUMBER OF COLUMNS/ROWS TO DELETE: Enables specification of the number of columns or rows to be deleted (1 - 99). 3. Press RETURN. This message appears: Delete? Use cursor to select and press RETURN. BYES (NO] Select YES to delete, or NO to cancel, then press RETURN. • Relative addresses in aformula are automatically adjusted. Example: D1 contains (B1 +C1) and you delete column A. D1 becomes Cl and now contains (Al+B1). • After deletion, subsequent columns or rows are renumbered. • Ifone or more cells among the data to be deleted areprotected, this window appears, and deletion is canceled: . Protected cell error! [ Press any key to continue. Spreadsheet 122
-
 1
1 -
2
-
3
-
4
-
5
-
6
-
7
-
8
-
9
-
10
-
11
-
12
-
13
-
14
-
15
-
16
-
17
-
18
-
19
-
20
-
21
-
22
-
23
-
24
-
25
-
26
-
27
-
28
-
29
-
30
-
31
-
32
-
33
-
34
-
35
-
36
-
37
-
38
-
39
-
40
-
41
-
42
-
43
-
44
-
45
-
46
-
47
-
48
-
49
-
50
-
51
-
52
-
53
-
54
-
55
-
56
-
57
-
58
-
59
-
60
-
61
-
62
-
63
-
64
-
65
-
66
-
67
-
68
-
69
-
70
-
71
-
72
-
73
-
74
-
75
-
76
-
77
-
78
-
79
-
80
-
81
-
82
-
83
-
84
-
85
-
86
-
87
-
88
-
89
-
90
-
91
-
92
-
93
-
94
-
95
-
96
-
97
-
98
-
99
-
100
-
101
-
102
-
103
-
104
-
105
-
106
-
107
-
108
-
109
-
110
-
111
-
112
-
113
-
114
-
115
-
116
-
117
-
118
-
119
-
120
-
121
-
122
-
123
-
124
-
 125
125 -
 126
126 -
 127
127 -
 128
128 -
 129
129 -
 130
130 -
 131
131 -
 132
132 -
 133
133 -
 134
134 -
 135
135 -
136
-
137
-
138
-
139
-
140
-
141
-
142
-
143
-
144
-
145
-
146
-
147
-
148
-
149
-
150
-
151
-
152
-
153
-
154
-
155
-
156
-
157
-
158
-
159
-
160
-
161
-
162
-
163
-
164
-
165
-
166
-
167
-
168
-
169
-
170
-
171
-
172
-
173
-
174
-
175
-
176
-
177
-
178
-
179
-
180
-
181
-
182
-
183
-
184
-
185
-
186
-
187
-
188
-
189
-
190
-
191
-
192
-
193
-
194
-
195
-
196
-
197
-
198
-
199
-
200
-
201
-
202
-
203
-
204
-
205
-
206
-
207
-
208
-
209
-
210
-
211
-
212
-
213
-
214
-
215
-
216
-
217
-
218
-
219
-
220
-
221
-
222
-
223
-
224
-
225
-
226
-
227
-
228
-
229
-
230
-
231
-
232
-
233
-
234
-
235
-
236
-
237
-
238
-
239
-
240
-
241
-
242
-
243
-
244
-
245
-
246
-
247
-
248
-
249
-
250
-
251
-
252
 |
 |