Brother International WP7550JPLUS Owner's Manual - English - Page 67
Input/Edit
 |
View all Brother International WP7550JPLUS manuals
Add to My Manuals
Save this manual to your list of manuals |
Page 67 highlights
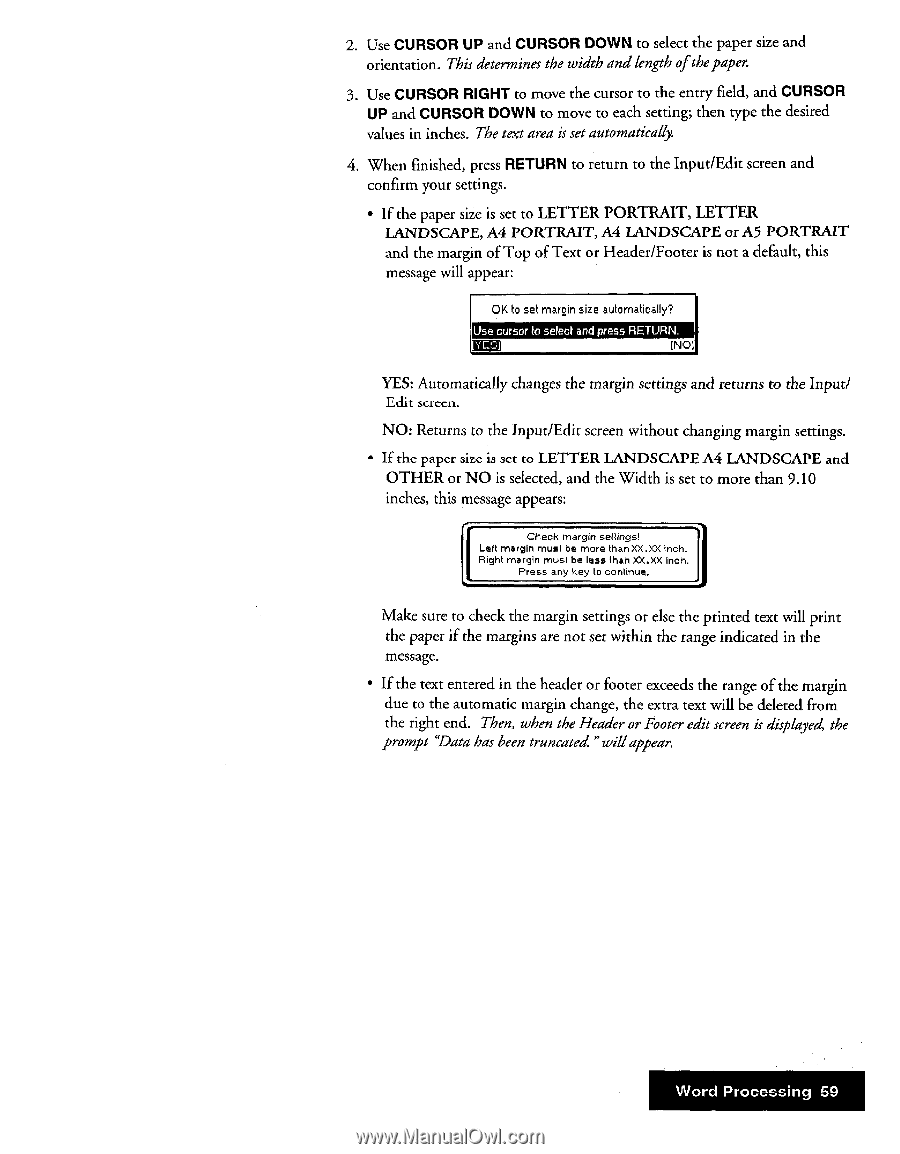
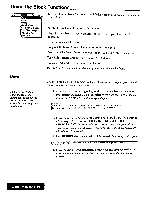
2. Use CURSOR UP and CURSOR DOWN to select the paper size and orientation. This determines the width and length ofthepaper. 3. Use CURSOR RIGHT to move the cursor to the entry field, and CURSOR UP and CURSOR DOWN to move to each setting; then type the desired values in inches. The text area is set automatically. 4. When finished, press RETURN to return to the Input/Edit screen and confirm your settings. • If the paper size is set to LETTER PORTRAIT, LETTER LANDSCAPE, A4 PORTRAIT, A4 LANDSCAPE or A5 PORTRAIT and the margin of Top of Text or Header/Footer is not a default, this message will appear: OK to set margin size automatically? Use cursor to select and press RETURN. (NOt YES: Automatically changes the margin settings and returns to the Input/ Edit screen. NO: Returns to the Input/Edit screen without changing margin settings. • If the paper size is set to LETTER LANDSCAPE A4 LANDSCAPE and OTHER or NO is selected, and the Width is set to more than 9.10 inches, this message appears: Check margin settings! Left margin must be more than XX.XX Inch. Right margin must he less than XX.XX inch. Press any key to continue. Make sure to check the margin settings or else the printed text will print the paper if the margins are not set within the range indicated in the message. • If the text entered in the header or footer exceeds the range of the margin due to the automatic margin change, the extra text will be deleted from the right end. Then, when the Header or Footer edit screen is displayer:4 the prompt `Data has been truncated."willappear. Word Processing 59
-
 1
1 -
2
-
3
-
4
-
5
-
6
-
7
-
8
-
9
-
10
-
11
-
12
-
13
-
14
-
15
-
16
-
17
-
18
-
19
-
20
-
21
-
22
-
23
-
24
-
25
-
26
-
27
-
28
-
29
-
30
-
31
-
32
-
33
-
34
-
35
-
36
-
37
-
38
-
39
-
40
-
41
-
42
-
43
-
44
-
45
-
46
-
47
-
48
-
49
-
50
-
51
-
52
-
53
-
54
-
55
-
56
-
57
-
58
-
59
-
60
-
61
-
 62
62 -
 63
63 -
 64
64 -
 65
65 -
 66
66 -
 67
67 -
 68
68 -
 69
69 -
 70
70 -
 71
71 -
 72
72 -
73
-
74
-
75
-
76
-
77
-
78
-
79
-
80
-
81
-
82
-
83
-
84
-
85
-
86
-
87
-
88
-
89
-
90
-
91
-
92
-
93
-
94
-
95
-
96
-
97
-
98
-
99
-
100
-
101
-
102
-
103
-
104
-
105
-
106
-
107
-
108
-
109
-
110
-
111
-
112
-
113
-
114
-
115
-
116
-
117
-
118
-
119
-
120
-
121
-
122
-
123
-
124
-
125
-
126
-
127
-
128
-
129
-
130
-
131
-
132
-
133
-
134
-
135
-
136
-
137
-
138
-
139
-
140
-
141
-
142
-
143
-
144
-
145
-
146
-
147
-
148
-
149
-
150
-
151
-
152
-
153
-
154
-
155
-
156
-
157
-
158
-
159
-
160
-
161
-
162
-
163
-
164
-
165
-
166
-
167
-
168
-
169
-
170
-
171
-
172
-
173
-
174
-
175
-
176
-
177
-
178
-
179
-
180
-
181
-
182
-
183
-
184
-
185
-
186
-
187
-
188
-
189
-
190
-
191
-
192
-
193
-
194
-
195
-
196
-
197
-
198
-
199
-
200
-
201
-
202
-
203
-
204
-
205
-
206
-
207
-
208
-
209
-
210
-
211
-
212
-
213
-
214
-
215
-
216
-
217
-
218
-
219
-
220
-
221
-
222
-
223
-
224
-
225
-
226
-
227
-
228
-
229
-
230
-
231
-
232
-
233
-
234
-
235
-
236
-
237
-
238
-
239
-
240
-
241
-
242
-
243
-
244
-
245
-
246
-
247
-
248
-
249
-
250
-
251
-
252
 |
 |