Brother International WP7550JPLUS Owner's Manual - English - Page 132
Worksheet, Protect, Calculation, Method
 |
View all Brother International WP7550JPLUS manuals
Add to My Manuals
Save this manual to your list of manuals |
Page 132 highlights
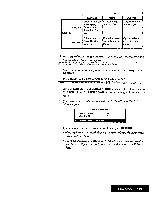
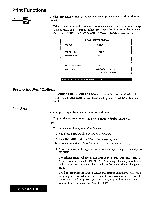
Worksheet Protect Calculation Method 2. Move the cursor to the opposite corner of the range you want to protect and press RETURN. The Protect window appears: Protect? Use cursor to select and press RETURN. ll [OFF] [CANCEL) 3. Use CURSOR LEFT and CURSOR RIGHT to select ON, OFF, or CANCEL and press RETURN. • ON: Protects all the cells of the range. • OFF: Changes all the cells in the range to unprotected. • CANCEL: Returns to the screen before MENU was pressed. This function is used to enable or disable the protection of a range of cells from accidental deleting or overwriting. When a worksheet is protected, you cannot delete or overwrite its contents. 1. Press MENU and select Sheet; then select Worksheet Protect from the Function menu. The Worksheet Protect window appears: Worksheet Protect? Use cursor to select and press RETURN. El l4BLEI IDISABLEI [CANCEL] 2. Use CURSOR LEFT and CURSOR RIGHT to select ENABLE, DISABLE, or CANCEL and press RETURN. • ENABLE: Enables the Range Protect function. • DISABLE Disables the Range Piotect runt dun. • CANCEL: Returns to the previous position before the menu was chosen. This function allows you to change the calculation method. When you are using the Spreadsheet for financial purpose, this function is useful to you. 1. Press MENU and select Sheet; then select Calculation Method from the function menu. This window appears. Calculation Precision? Use cursor to select and press RETURN. FULL PREi_m1.2,11Ell614;jaiggivi 4410fileNIA1L 2. Use CURSOR LEFT and CURSOR RIGHT to select USE FULL PRECISION, USE PRECISION AS DISPLAYED, or CANCEL, and press RETURN. • If you select USE PULL PRECISION, calculation is carried out precisely. Spreadsheet 124
-
 1
1 -
2
-
3
-
4
-
5
-
6
-
7
-
8
-
9
-
10
-
11
-
12
-
13
-
14
-
15
-
16
-
17
-
18
-
19
-
20
-
21
-
22
-
23
-
24
-
25
-
26
-
27
-
28
-
29
-
30
-
31
-
32
-
33
-
34
-
35
-
36
-
37
-
38
-
39
-
40
-
41
-
42
-
43
-
44
-
45
-
46
-
47
-
48
-
49
-
50
-
51
-
52
-
53
-
54
-
55
-
56
-
57
-
58
-
59
-
60
-
61
-
62
-
63
-
64
-
65
-
66
-
67
-
68
-
69
-
70
-
71
-
72
-
73
-
74
-
75
-
76
-
77
-
78
-
79
-
80
-
81
-
82
-
83
-
84
-
85
-
86
-
87
-
88
-
89
-
90
-
91
-
92
-
93
-
94
-
95
-
96
-
97
-
98
-
99
-
100
-
101
-
102
-
103
-
104
-
105
-
106
-
107
-
108
-
109
-
110
-
111
-
112
-
113
-
114
-
115
-
116
-
117
-
118
-
119
-
120
-
121
-
122
-
123
-
124
-
125
-
126
-
 127
127 -
 128
128 -
 129
129 -
 130
130 -
 131
131 -
 132
132 -
 133
133 -
 134
134 -
 135
135 -
 136
136 -
 137
137 -
138
-
139
-
140
-
141
-
142
-
143
-
144
-
145
-
146
-
147
-
148
-
149
-
150
-
151
-
152
-
153
-
154
-
155
-
156
-
157
-
158
-
159
-
160
-
161
-
162
-
163
-
164
-
165
-
166
-
167
-
168
-
169
-
170
-
171
-
172
-
173
-
174
-
175
-
176
-
177
-
178
-
179
-
180
-
181
-
182
-
183
-
184
-
185
-
186
-
187
-
188
-
189
-
190
-
191
-
192
-
193
-
194
-
195
-
196
-
197
-
198
-
199
-
200
-
201
-
202
-
203
-
204
-
205
-
206
-
207
-
208
-
209
-
210
-
211
-
212
-
213
-
214
-
215
-
216
-
217
-
218
-
219
-
220
-
221
-
222
-
223
-
224
-
225
-
226
-
227
-
228
-
229
-
230
-
231
-
232
-
233
-
234
-
235
-
236
-
237
-
238
-
239
-
240
-
241
-
242
-
243
-
244
-
245
-
246
-
247
-
248
-
249
-
250
-
251
-
252
 |
 |
