Brother International WP7550JPLUS Owner's Manual - English - Page 65
SPACE, RETURN, Typing, multi, column, s
 |
View all Brother International WP7550JPLUS manuals
Add to My Manuals
Save this manual to your list of manuals |
Page 65 highlights
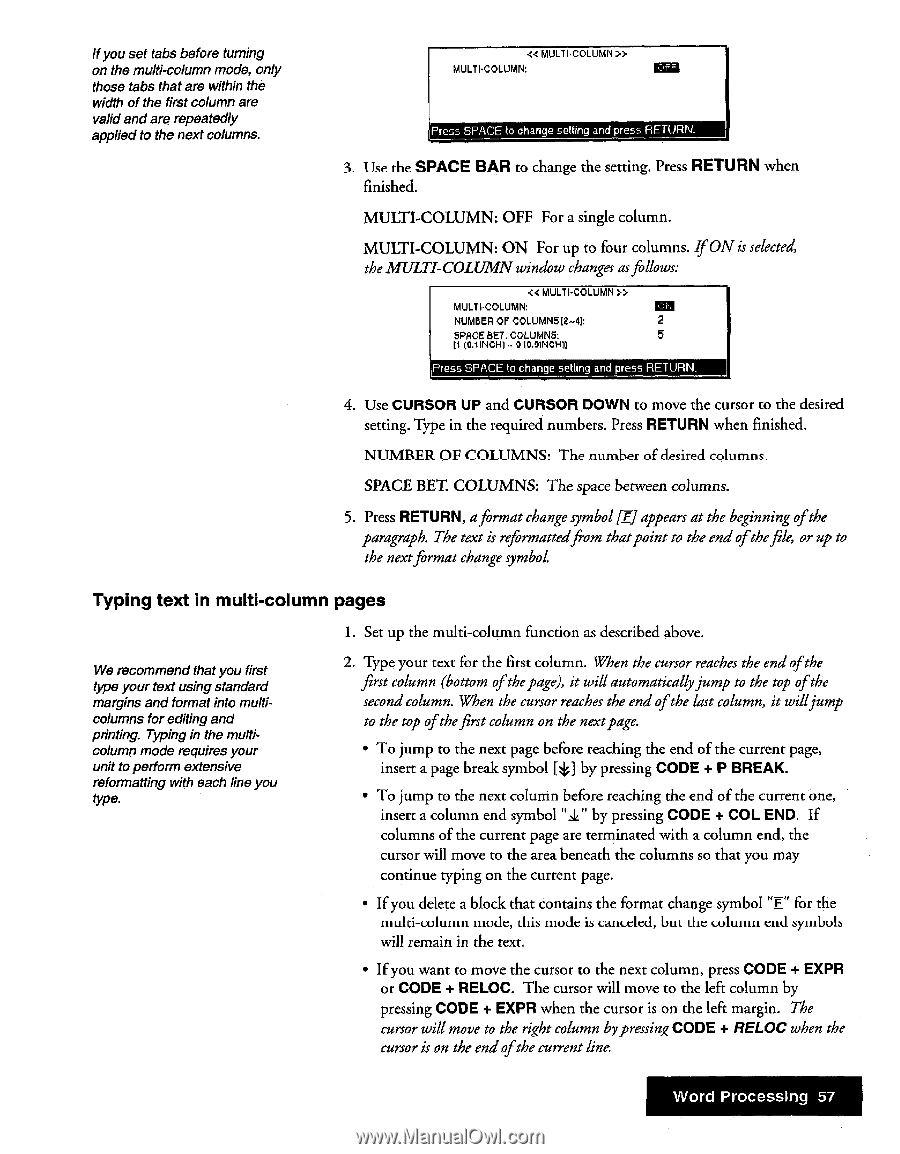
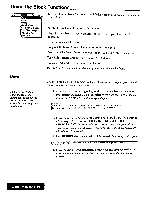
if you set tabs before turning on the multi-column mode, only those tabs that are within the width of the first column are valid and are repeatedly applied to the next columns. 4‹ MULT l•COLUMN » MULTI-COLUMN: Press SPACE to change setting and press RETURN. 3 11-w the SPACE BAR to change the setting. Press RETURN when finished. MULTI-COLUMN: OFF For a single column. MULTI-COLUMN: ON For up to four columns. If ON is selected, the MULTI-COLUMN window changes asfollows: « MULT I-COLUMN >> MULTI-COLUMN: NUMBER OF COLUMNS [2-41: 2 EWE BET. COLUMNS: 5 Et OA INCH) - 9 (0.9INCH)) Press SPACE to change setting and press RETURN. 4. Use CURSOR UP and CURSOR DOWN to move the cursor to the desired setting. Type in the required numbers. Press RETURN when finished. NUMBER OF COLUMNS! The number of desired columns. SPACE BET. COLUMNS: The space between columns. 5. Press RETURN, aformat change symbol liEJ appears at the beginning ofthe paragraph. The text is reformattedfrom thatpoint to the end ofthefile, or up to the nextformat change symbol Typing text in multi-column pages I. Set up the multi-column function as described above. We recommend that you first type your text using standard margins and format into multicolumns for editing and printing. Typing in the multicolumn mode requires your unit to perform extensive reformatting with each line you type. 2. Type your text for the first column. When the cursor reaches the end of the first column (bottom ofthepage), it will automaticallyjump to the top ofthe second column. When the cursor reaches the end ofthe last column, it willjump to the top of thefirst column on the nextpage. • To jump to the next page before reaching the end of the current page, insert a page break symbol fC by pressing CODE + P BREAK. • To jump to the next column before reaching the end of the current one, insert a column end symbol "a" by pressing CODE + COL END. If columns of the current page are terminated with a column end, the cursor will move to the area beneath the columns so that you may continue typing on the current page. • If you delete a block that contains the format change symbol "E" for the multi-column mode, this mode is canceled, but the column end symbols will remain in the text. • If you want to move the cursor to the next column, press CODE + EXPR or CODE + RELOC. The cursor will move to the left column by pressing CODE + EXPR when the cursor is on the left margin. The cursor will move to the right column by pressing CODE + RELOC when the cursor is on the end ofthe current line. Word Processing 57
-
 1
1 -
2
-
3
-
4
-
5
-
6
-
7
-
8
-
9
-
10
-
11
-
12
-
13
-
14
-
15
-
16
-
17
-
18
-
19
-
20
-
21
-
22
-
23
-
24
-
25
-
26
-
27
-
28
-
29
-
30
-
31
-
32
-
33
-
34
-
35
-
36
-
37
-
38
-
39
-
40
-
41
-
42
-
43
-
44
-
45
-
46
-
47
-
48
-
49
-
50
-
51
-
52
-
53
-
54
-
55
-
56
-
57
-
58
-
59
-
 60
60 -
 61
61 -
 62
62 -
 63
63 -
 64
64 -
 65
65 -
 66
66 -
 67
67 -
 68
68 -
 69
69 -
 70
70 -
71
-
72
-
73
-
74
-
75
-
76
-
77
-
78
-
79
-
80
-
81
-
82
-
83
-
84
-
85
-
86
-
87
-
88
-
89
-
90
-
91
-
92
-
93
-
94
-
95
-
96
-
97
-
98
-
99
-
100
-
101
-
102
-
103
-
104
-
105
-
106
-
107
-
108
-
109
-
110
-
111
-
112
-
113
-
114
-
115
-
116
-
117
-
118
-
119
-
120
-
121
-
122
-
123
-
124
-
125
-
126
-
127
-
128
-
129
-
130
-
131
-
132
-
133
-
134
-
135
-
136
-
137
-
138
-
139
-
140
-
141
-
142
-
143
-
144
-
145
-
146
-
147
-
148
-
149
-
150
-
151
-
152
-
153
-
154
-
155
-
156
-
157
-
158
-
159
-
160
-
161
-
162
-
163
-
164
-
165
-
166
-
167
-
168
-
169
-
170
-
171
-
172
-
173
-
174
-
175
-
176
-
177
-
178
-
179
-
180
-
181
-
182
-
183
-
184
-
185
-
186
-
187
-
188
-
189
-
190
-
191
-
192
-
193
-
194
-
195
-
196
-
197
-
198
-
199
-
200
-
201
-
202
-
203
-
204
-
205
-
206
-
207
-
208
-
209
-
210
-
211
-
212
-
213
-
214
-
215
-
216
-
217
-
218
-
219
-
220
-
221
-
222
-
223
-
224
-
225
-
226
-
227
-
228
-
229
-
230
-
231
-
232
-
233
-
234
-
235
-
236
-
237
-
238
-
239
-
240
-
241
-
242
-
243
-
244
-
245
-
246
-
247
-
248
-
249
-
250
-
251
-
252
 |
 |