Brother International WP7550JPLUS Owner's Manual - English - Page 25
immediately.
 |
View all Brother International WP7550JPLUS manuals
Add to My Manuals
Save this manual to your list of manuals |
Page 25 highlights
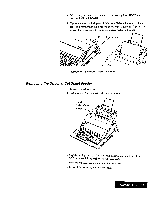
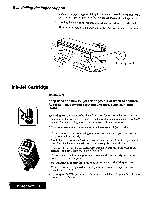
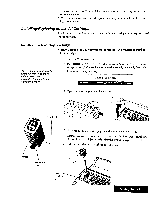
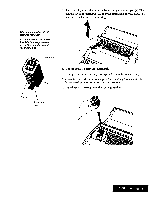
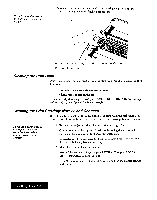
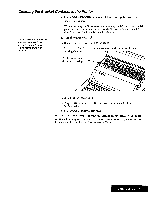
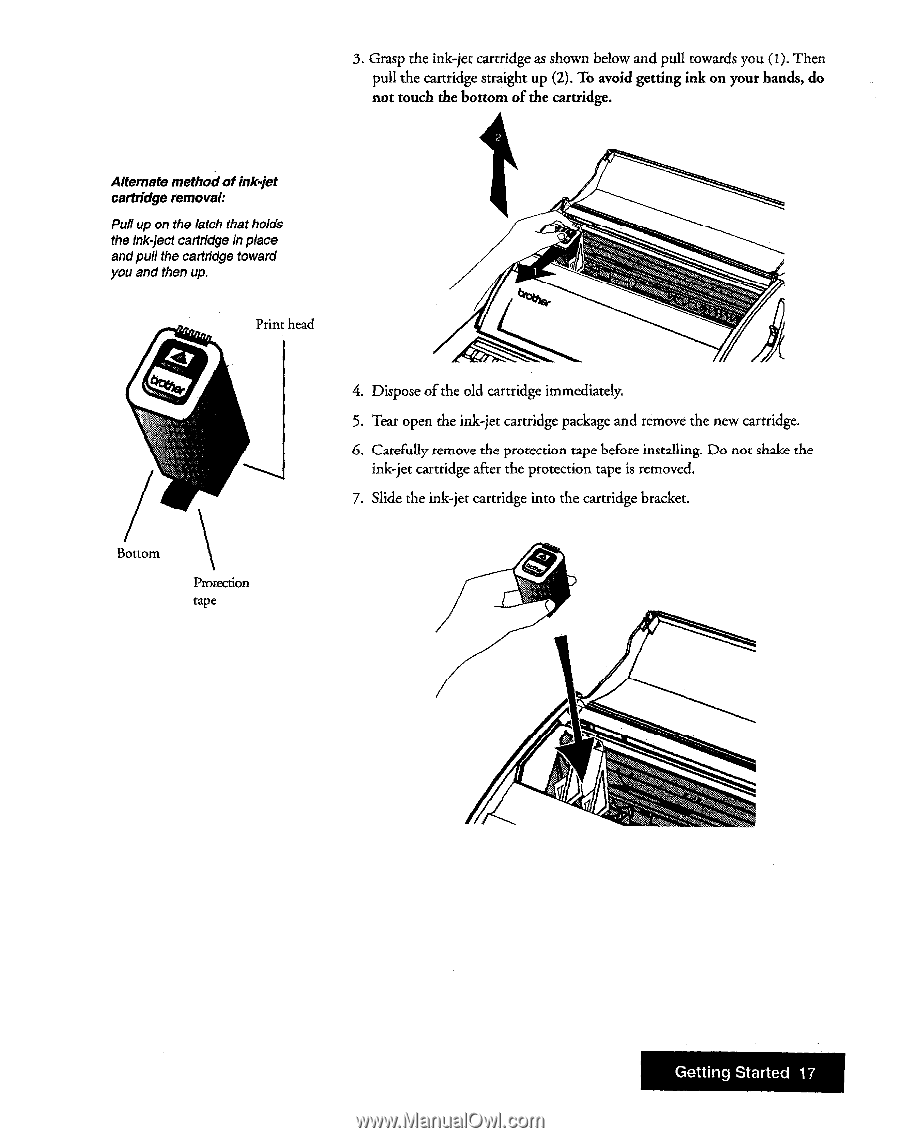
3. Grasp the ink-jet cartridge as shown below and pull towards you (1). Then pull the cartridge straight up (2). To avoid getting ink on your hands, do not touch the bottom of the cartridge. Alternate methodofink-jet cartridge removal: Pull up on the latch that holds the ink-ject cartridge in place and pull the cartridge toward you and then up. Print head Bottom Protection tape 4. Dispose of the old cartridge immediately. 5. Tear open the ink-jet cartridge package and remove the new cartridge. 6. Carefully remove the protection tape before installing. Do not shake the ink-jet cartridge after the protection tape is removed. 7. Slide the ink-jet cartridge into the cartridge bracket. Getting Started 17
-
 1
1 -
2
-
3
-
4
-
5
-
6
-
7
-
8
-
9
-
10
-
11
-
12
-
13
-
14
-
15
-
16
-
17
-
18
-
19
-
 20
20 -
 21
21 -
 22
22 -
 23
23 -
 24
24 -
 25
25 -
 26
26 -
 27
27 -
 28
28 -
 29
29 -
 30
30 -
31
-
32
-
33
-
34
-
35
-
36
-
37
-
38
-
39
-
40
-
41
-
42
-
43
-
44
-
45
-
46
-
47
-
48
-
49
-
50
-
51
-
52
-
53
-
54
-
55
-
56
-
57
-
58
-
59
-
60
-
61
-
62
-
63
-
64
-
65
-
66
-
67
-
68
-
69
-
70
-
71
-
72
-
73
-
74
-
75
-
76
-
77
-
78
-
79
-
80
-
81
-
82
-
83
-
84
-
85
-
86
-
87
-
88
-
89
-
90
-
91
-
92
-
93
-
94
-
95
-
96
-
97
-
98
-
99
-
100
-
101
-
102
-
103
-
104
-
105
-
106
-
107
-
108
-
109
-
110
-
111
-
112
-
113
-
114
-
115
-
116
-
117
-
118
-
119
-
120
-
121
-
122
-
123
-
124
-
125
-
126
-
127
-
128
-
129
-
130
-
131
-
132
-
133
-
134
-
135
-
136
-
137
-
138
-
139
-
140
-
141
-
142
-
143
-
144
-
145
-
146
-
147
-
148
-
149
-
150
-
151
-
152
-
153
-
154
-
155
-
156
-
157
-
158
-
159
-
160
-
161
-
162
-
163
-
164
-
165
-
166
-
167
-
168
-
169
-
170
-
171
-
172
-
173
-
174
-
175
-
176
-
177
-
178
-
179
-
180
-
181
-
182
-
183
-
184
-
185
-
186
-
187
-
188
-
189
-
190
-
191
-
192
-
193
-
194
-
195
-
196
-
197
-
198
-
199
-
200
-
201
-
202
-
203
-
204
-
205
-
206
-
207
-
208
-
209
-
210
-
211
-
212
-
213
-
214
-
215
-
216
-
217
-
218
-
219
-
220
-
221
-
222
-
223
-
224
-
225
-
226
-
227
-
228
-
229
-
230
-
231
-
232
-
233
-
234
-
235
-
236
-
237
-
238
-
239
-
240
-
241
-
242
-
243
-
244
-
245
-
246
-
247
-
248
-
249
-
250
-
251
-
252
 |
 |
3.
Grasp
the
ink
-jet
cartridge
as
shown
below
and
pull
towards
you
(1).
Then
pull
the
cartridge
straight
up
(2).
To
avoid
getting
ink
on
your
hands,
do
not
touch
the
bottom
of
the
cartridge.
Alternate
method
of
ink
-jet
cartridge
removal:
Pull
up
on
the
latch
that
holds
the
ink-ject
cartridge
in
place
and
pull
the
cartridge
toward
you
and
then
up.
Print
head
4.
Dispose
of
the
old
cartridge
immediately.
5.
Tear
open
the
ink
-jet
cartridge
package
and
remove
the
new
cartridge.
6.
Carefully
remove
the
protection
tape
before
installing.
Do
not
shake
the
ink
-jet
cartridge
after
the
protection
tape
is
removed.
7.
Slide
the
ink
-jet
cartridge
into
the
cartridge
bracket.
Bottom
Protection
tape
Getting
Started
17